
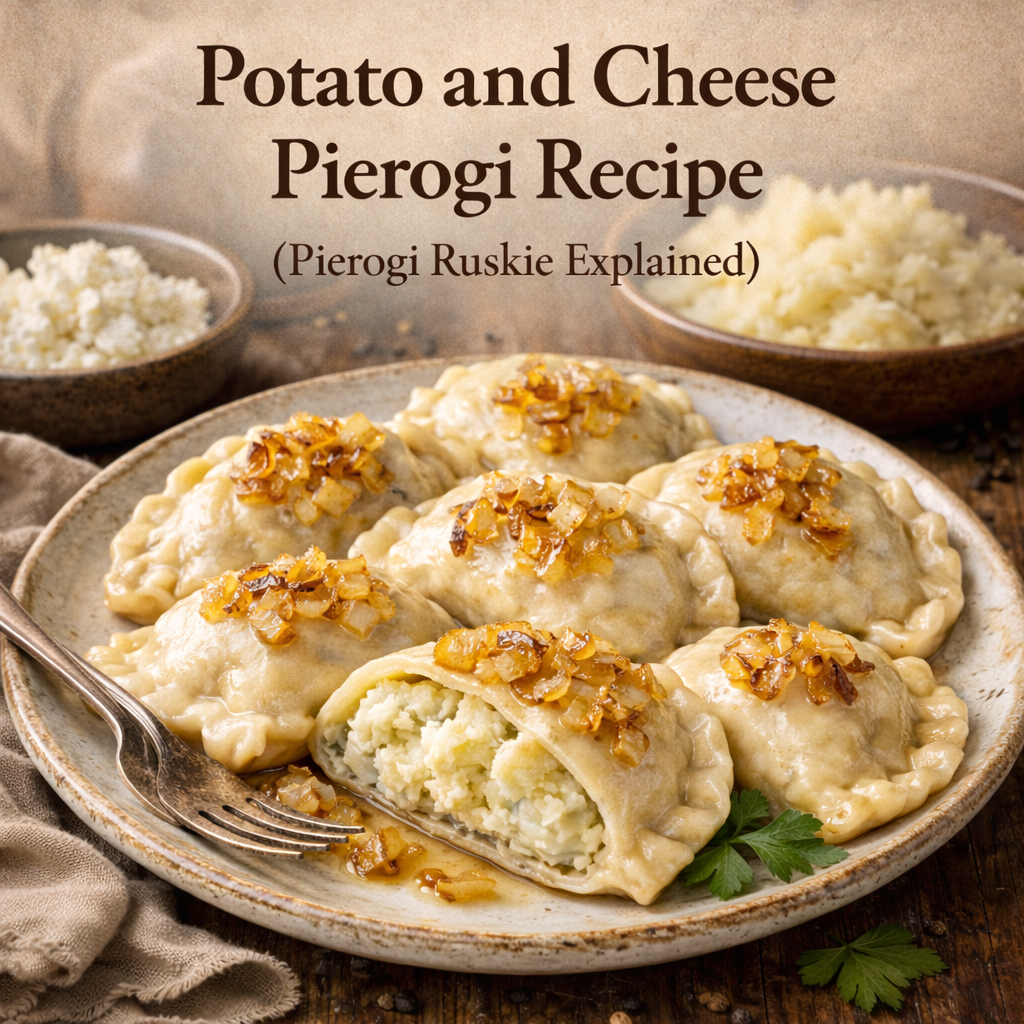
Potato and Cheese Pierogi
Potato and Cheese Pierogies Recipe lovers often discover that pierogi ruskie sit at the heart of the potato and cheese pierogi tradition and represent authentic Polish pierogi at their best. These classic pierogi are a true comfort food, widely recognized as Eastern European dumplings and a proud Polish traditional dish prepared in many homes as homemade pierogi. Their pierogi popularity comes from simple, balanced flavors rooted in history, including the name Ruthenian pierogi, which reflects Ukrainian influence rather than Russia.

A common pierogi naming clarification is important here: the pierog plural form is already plural, so pierogi vs pierogies is a language difference, not a recipe change. In traditional Polish cuisine, pierogi are valued for balance, not excess, and that philosophy defines this recipe.
Ingredients That Build the Perfect Dough
The base of a great pierogi always starts with the right pierogi dough ingredients, and over time I’ve learned that simplicity matters more than trends. A mix of all purpose flour or pierogi flour, salt, and warm water creates structure, while the correct hot water temperature helps form a soft dough that is easy to handle. For richness and flexibility, I usually add butter or vegetable oil, though a vegan butter option works well for plant-based kitchens. When mixed properly, the result is a pliable dough that rolls smoothly and seals without tearing.
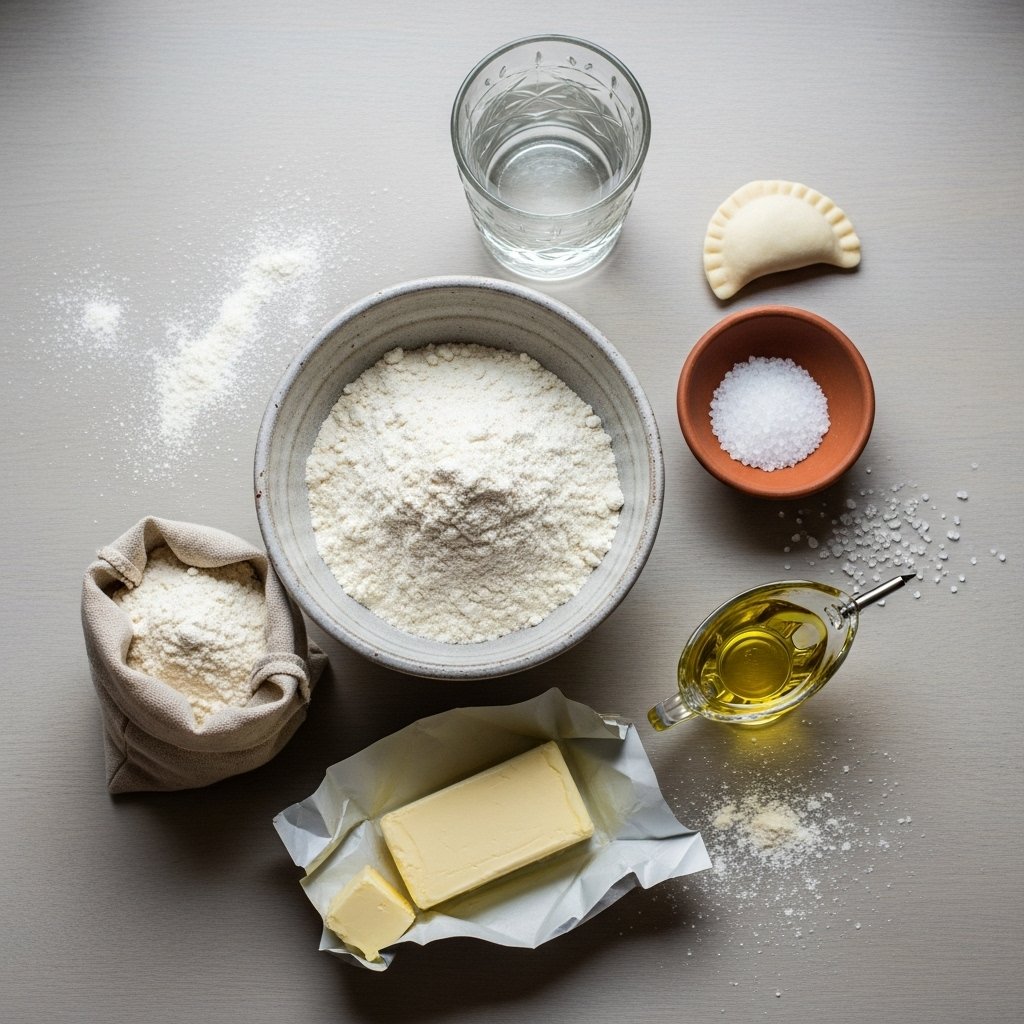
What makes this approach reliable is sticking close to a traditional dough recipe while understanding variations. An egg free dough keeps the texture light and tender, but some cooks prefer an egg dough variation for extra strength. Others experiment with a sour cream dough variation, which adds softness but slightly changes flavor. Through practice, I’ve found that a simple dough recipe that produces an elastic dough gives the most consistent results for potato and cheese pierogi, especially when making larger batches at home.
Building a Balanced Potato–Cheese Filling
A classic potato and cheese filling depends on choosing the right base, starting with starchy potatoes like russet potatoes that mash smoothly into creamy mashed potatoes. For cheese, traditional recipes rely on farmer cheese or twaróg cheese, often called white cheese, because it blends gently without overpowering the potatoes. I usually prefer full fat cheese for richness, but reduced fat cheese can work if the texture is adjusted carefully. The key is respecting the potatoes to cheese ratio, which keeps the filling soft while maintaining proper filling flavor balance.
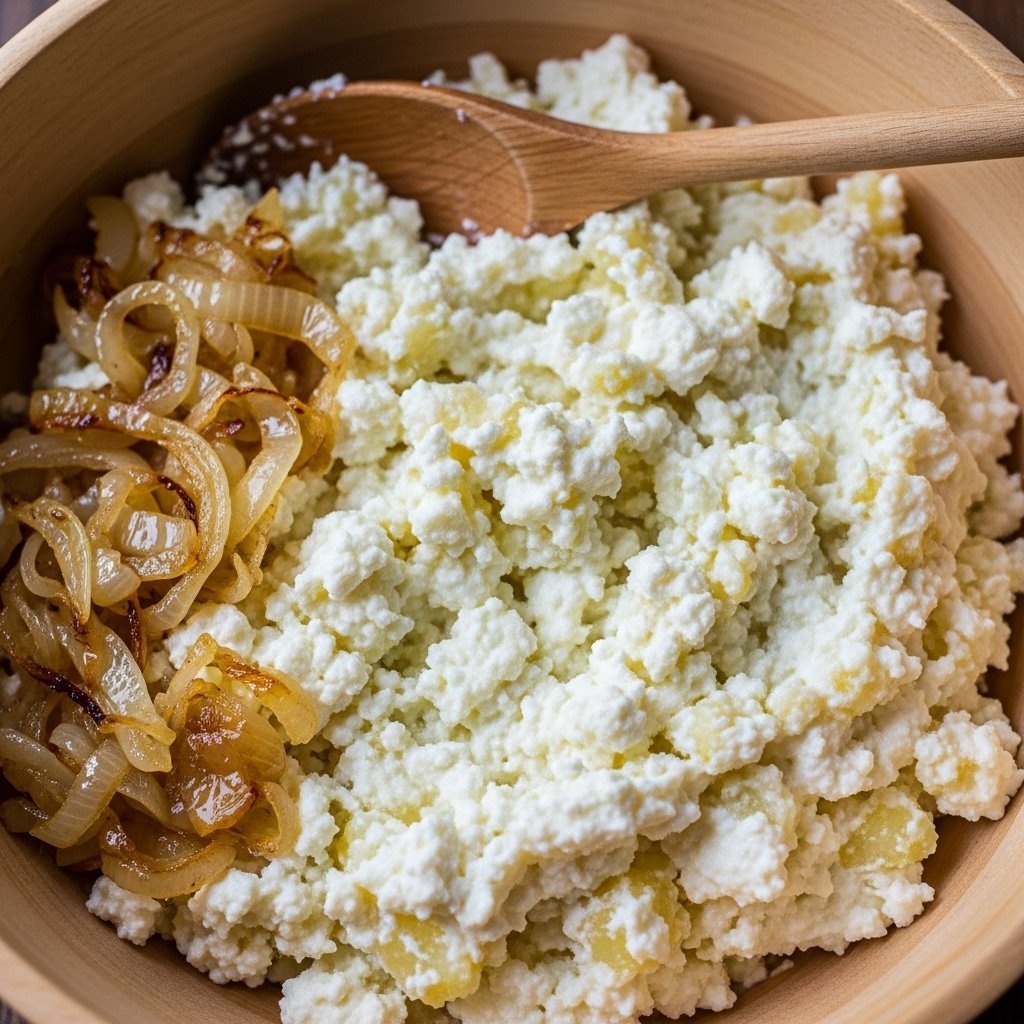
Flavor depth comes from onions and seasoning rather than heavy spices. Sauteed onions, especially caramelized onions made from sweet onions, add natural sweetness and aroma. Simple seasoning with salt, black pepper, and careful pepper seasoning brings everything together without masking the cheese. From experience, mixing while the potatoes are still warm helps the filling combine evenly, creating a smooth texture that stays rich and consistent inside the pierogi.
Understanding Twaróg and Similar Cheeses
twaróg cheese is a traditional Polish curd cheese and is often called white cheese Poland, making it a core ingredient in authentic pierogi fillings. It is made as a sour milk cheese that is gently heated and then turned into a strained cheese, which gives it a firm but crumbly body. This unique process affects both cheese texture and taste, creating a mild tang that sets it apart from other dairy options. In Polish kitchens, this ingredient is treated as a Polish national cheese, valued for its balance and versatility.
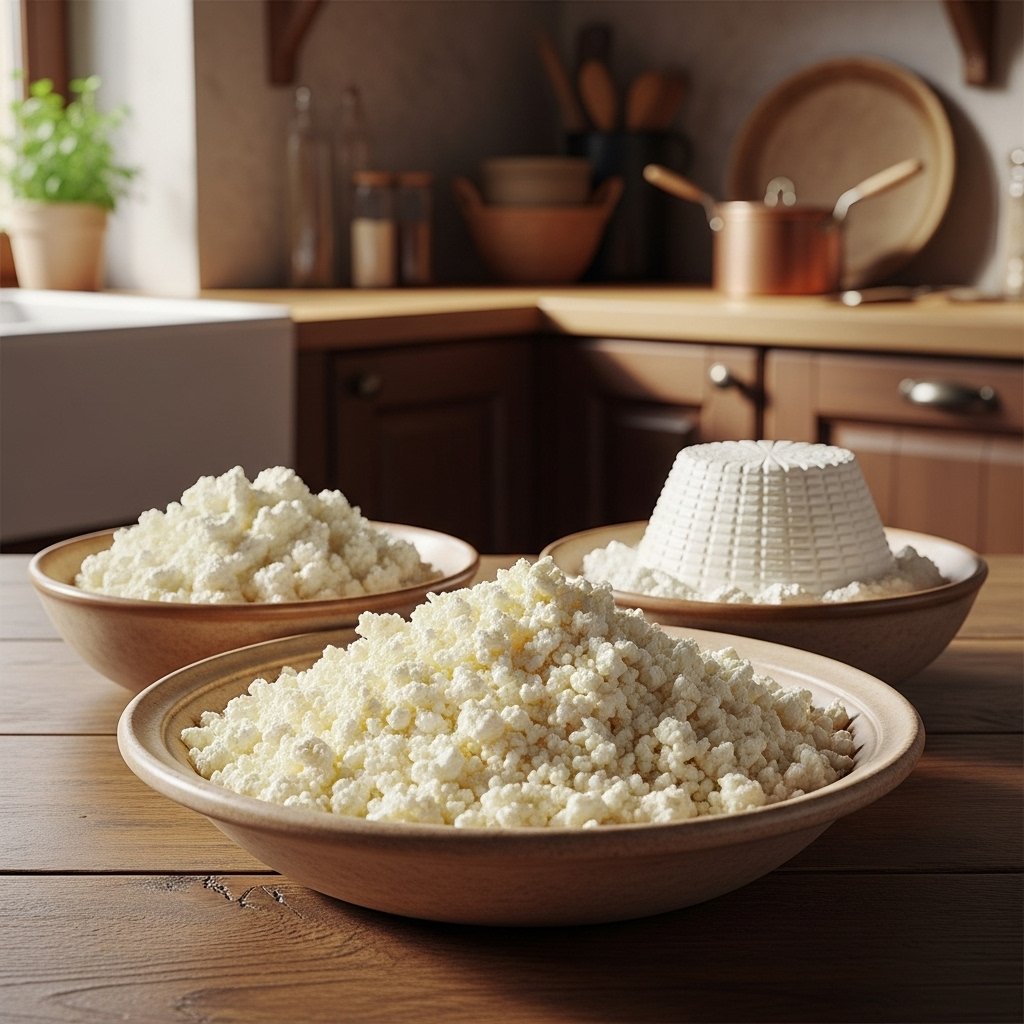
When twaróg is hard to find, cooks often look for a farmer cheese substitute, and the closest options include a ricotta substitute or a cottage cheese substitute, though both have noticeable cheese flavor difference and higher moisture. In some regions, quark cheese or topfen cheese are used because they share a similar structure and acidity. From experience, draining substitutes well is essential so the filling stays firm and sm
Making a Soft and Workable Pierogi Dough
For a reliable dough, I always start with boiling water and allow warm water cooling so it is hot but safe to handle. In a large bowl, I begin mixing flour and salt, then making a well in the center, which helps control moisture. At this stage, egg addition optional is a personal choice; traditional versions work beautifully without it. The key moment is pouring hot water into the flour and using wooden spoon mixing first, which prevents lumps and keeps the texture even from the start.
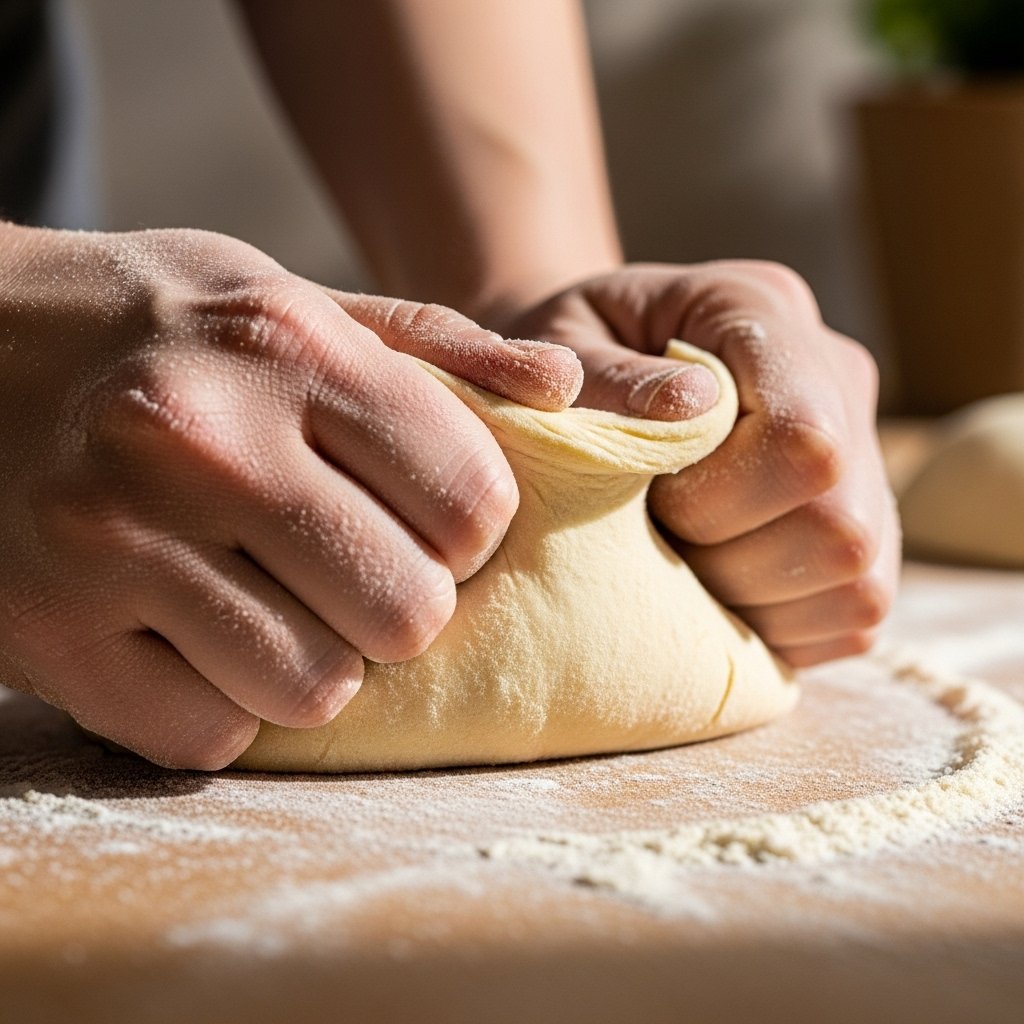
Once combined, I move into kneading dough until it becomes smooth dough with an elastic dough feel, usually knead 5 minutes by hand. On busy days, stand mixer kneading or food processor dough works just as well if you watch the texture closely. After kneading, dough resting is essential; I cover it with plastic wrap and let it rest 20–30 minutes. From experience, this short rest makes rolling easier and gives the pierogi dough the flexibility needed for clean shaping later.
Building a Balanced Potato and Cheese Filling
I always begin by boiling potatoes in salted water until they are soft, then carefully draining potatoes to remove excess moisture. While they are still warm, I focus on mashing potatoes, using a potato ricer or food mill when I want an extra-smooth texture. At the same time, I prepare sauteed onions through gentle onion frying with oil or butter frying, which adds depth without overpowering the filling. This slow approach keeps the base rich but clean in flavor.
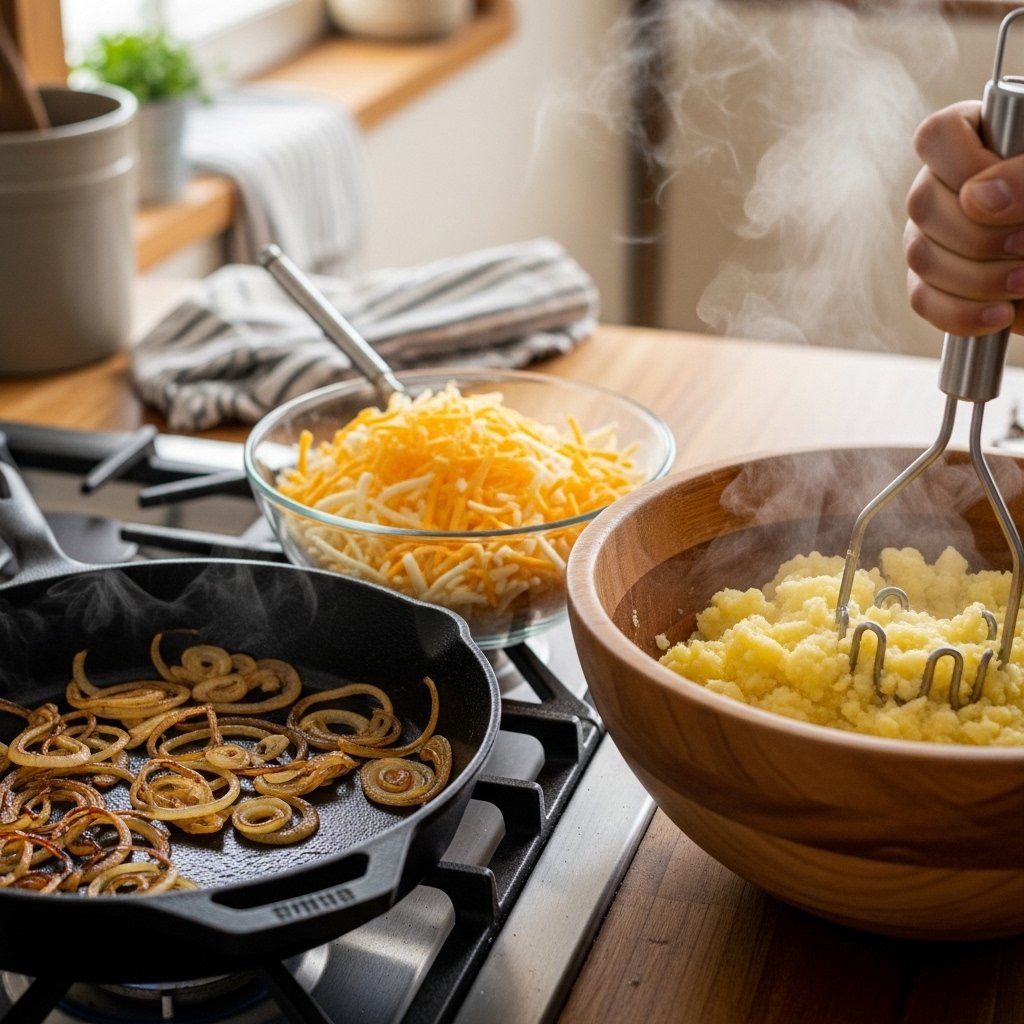
Once ready, I move on to combining potatoes and cheese, paying close attention to seasoning filling with salt and pepper so the taste stays balanced. I always allow cooling filling before use, which improves handling and prevents tearing the dough. For speed and uniformity, shaping filling balls helps maintain even portions, while checking filling consistency ensures the mixture is firm enough to seal but still creamy when cooked.
Rolling the Dough Evenly
I start by dividing dough and working on a clean floured surface with a steady rolling pin. The goal is thin dough, and depending on preference I aim for 1/8 inch thickness, 1/16 inch thickness, or about 3 mm thickness. I rely on flipping dough often for preventing sticking and maintaining even thickness, which improves cooking results.
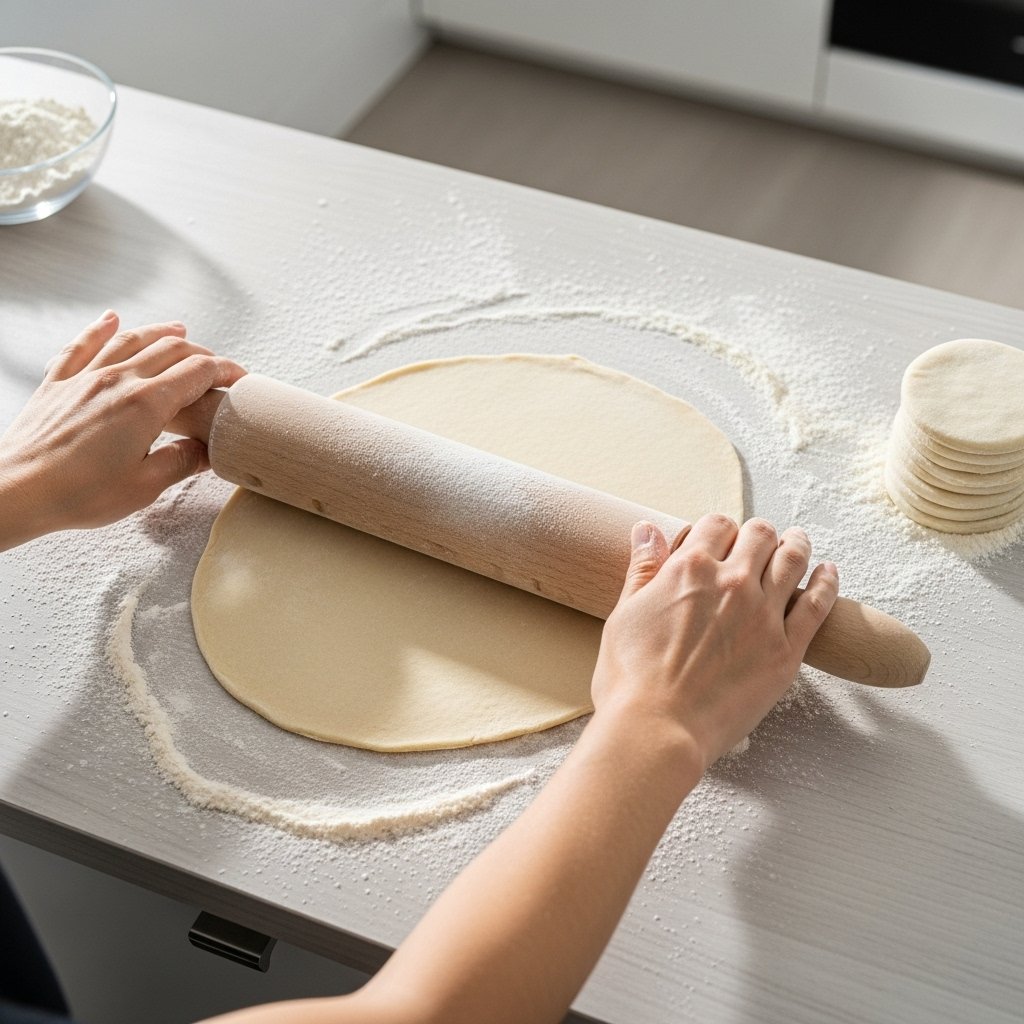
Good dough elasticity matters here, so a slow and patient rolling technique always works better than rushing. From experience, evenly rolled dough seals better and avoids tearing later.
Shaping and Sealing Pierogi
Once rolled, I move to cutting dough circles using a glass cutter, pastry cutter, 3 inch cutter, or 3¼ inch cutter. While placing filling, I stick to teaspoon filling amounts to avoid leaks. After folding dough into a half moon shape, I focus on sealing edges carefully.
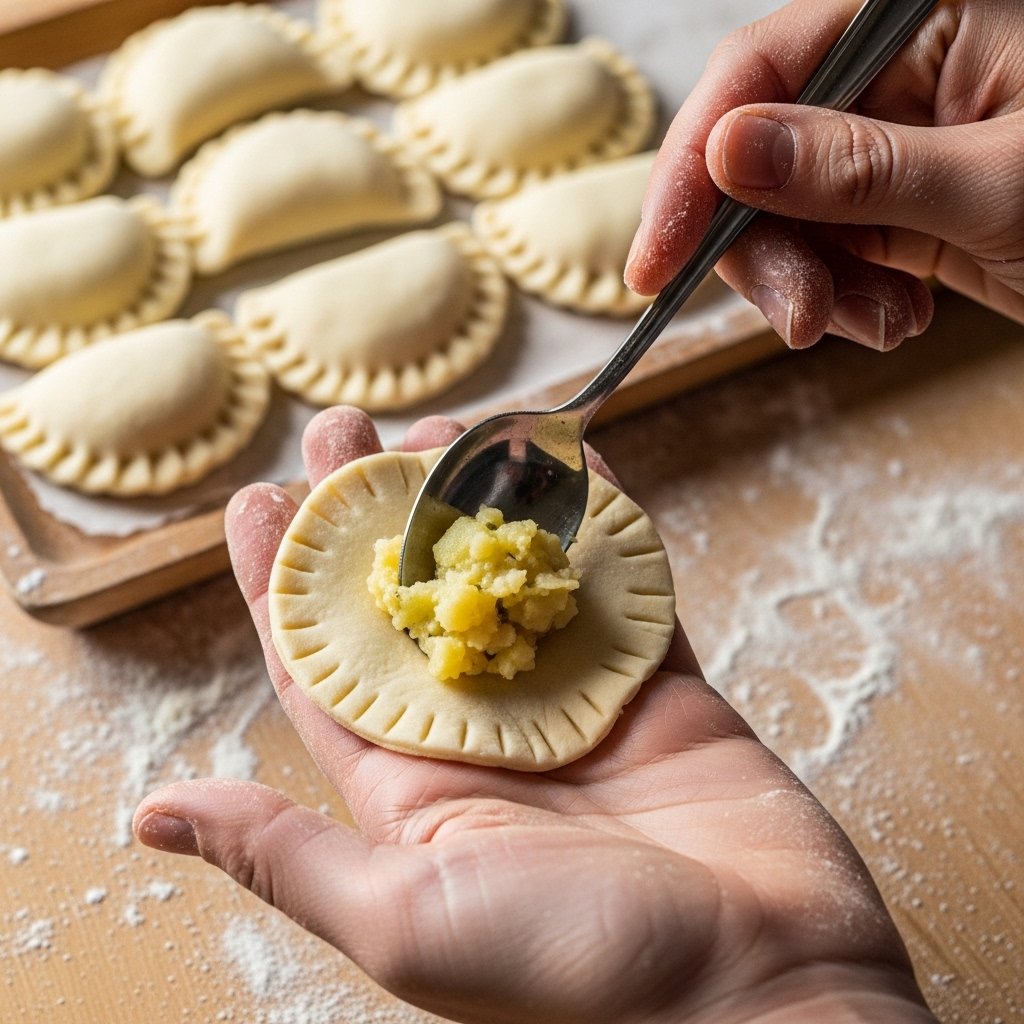
I use pinching edges, sometimes crimping edges, or even adding a decorative edge. Keeping clean edges is key for preventing bursting during cooking.
Cooking the Pierogi Properly
For cooking, I prefer boiling pierogi in a large pot of salted water with a little vegetable oil in water. I always use batch cooking so the pierogi have space. First there is pierogi sinking, then pierogi floating, and I cook after floating for 1–3 minutes cooking.
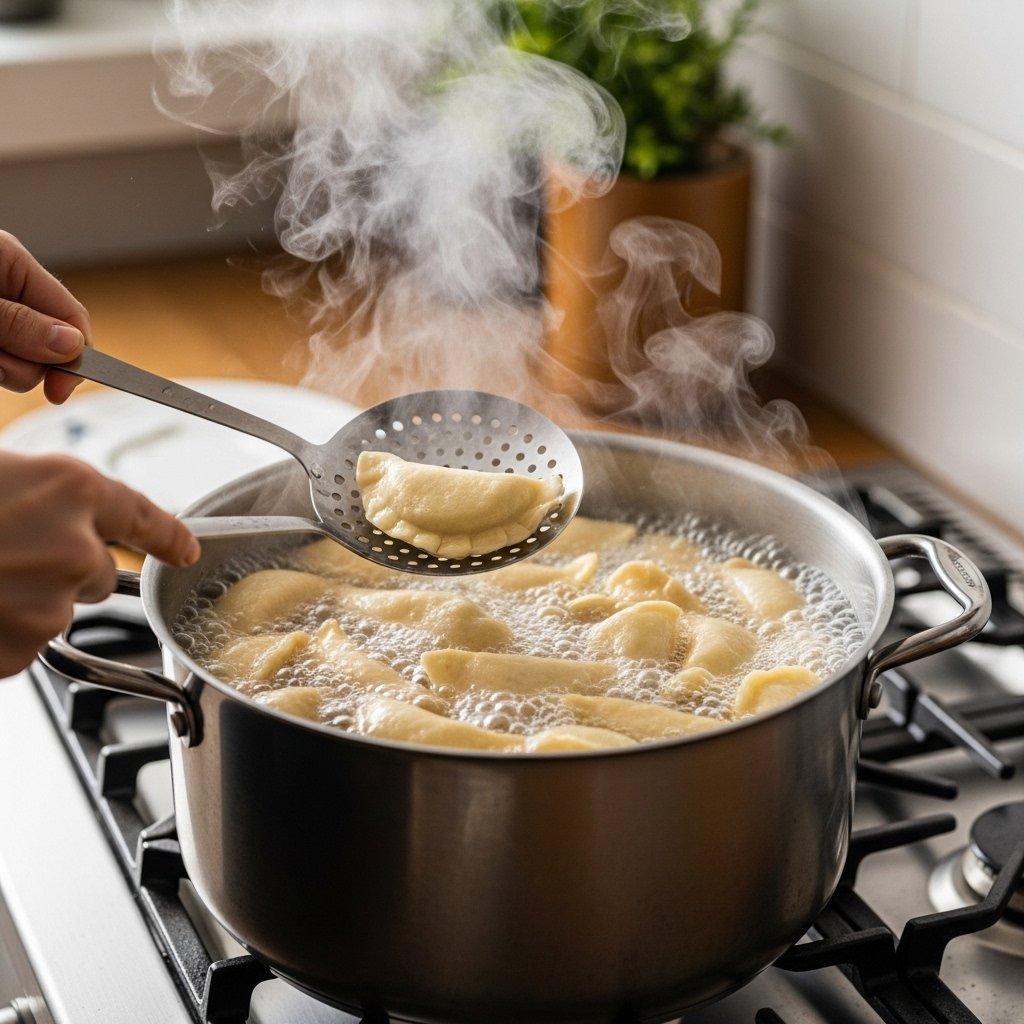
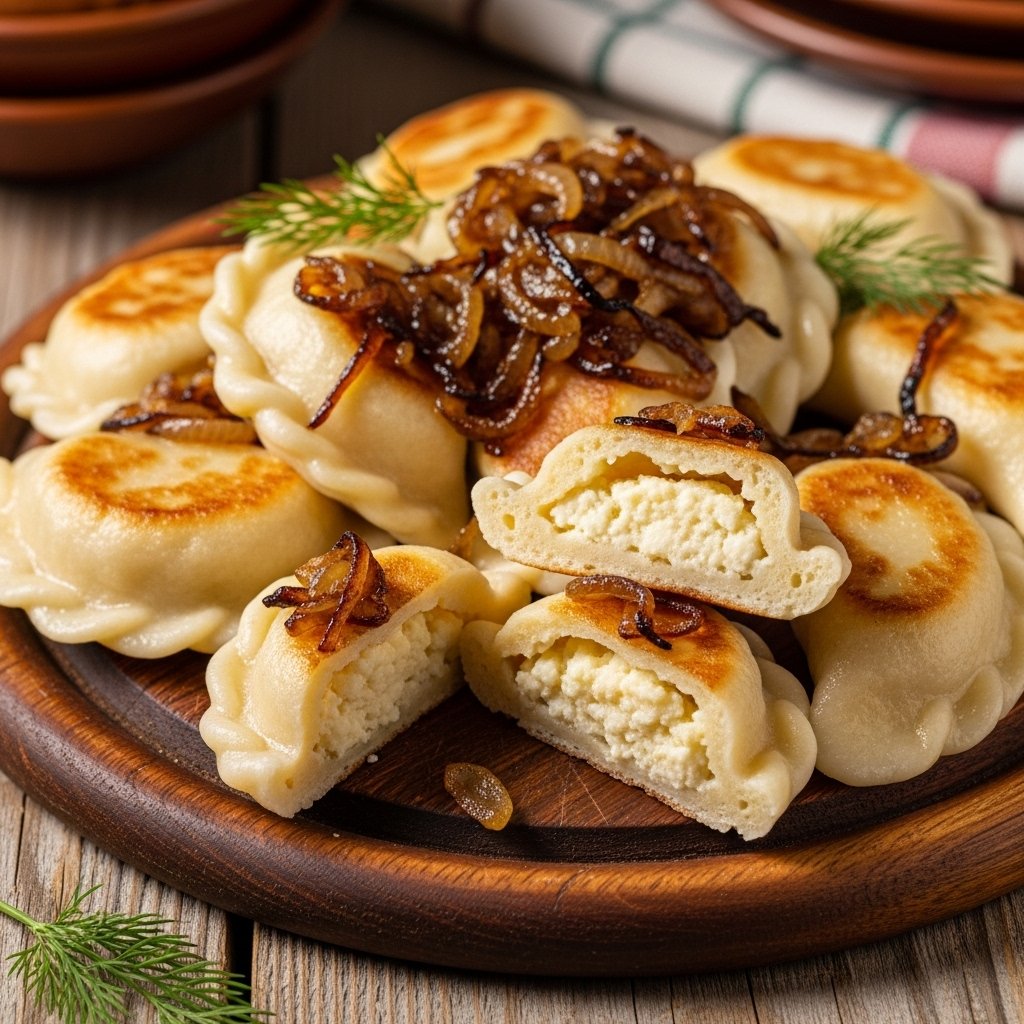
I remove them using a slotted spoon, draining pierogi gently, then apply butter coating or olive oil coating. Sometimes I finish with pan frying pierogi until golden brown pierogi form.
Serving Ideas That Feel Traditional
My favorite pierogi serving ideas include melted butter, sauteed onions, and caramelized onions. For richer plates, crispy bacon, smoked bacon, or pork fat work well. Classic sides like sour cream, applesauce, mushrooms, and sauerkraut reflect traditional Polish serving.
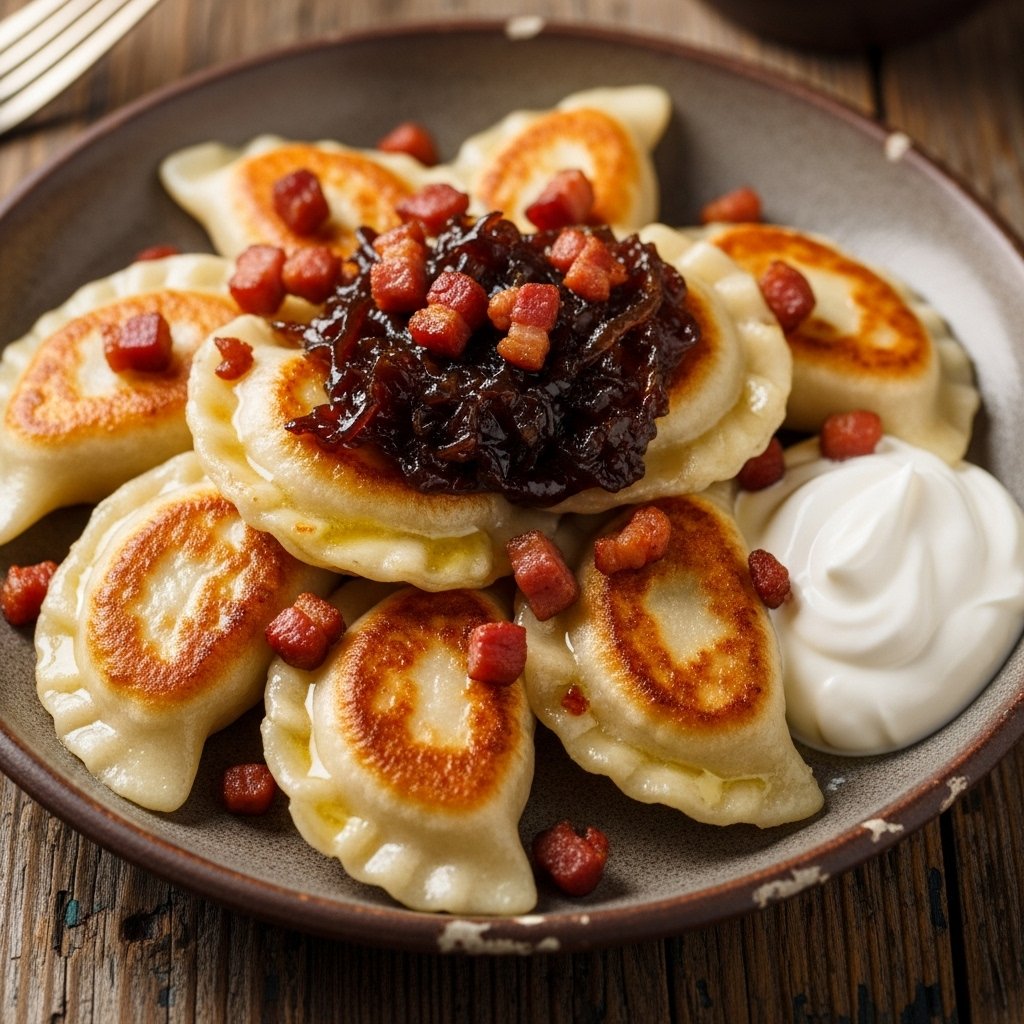
This style of comfort food plating keeps the dish simple but satisfying.
Storing Pierogi Safely
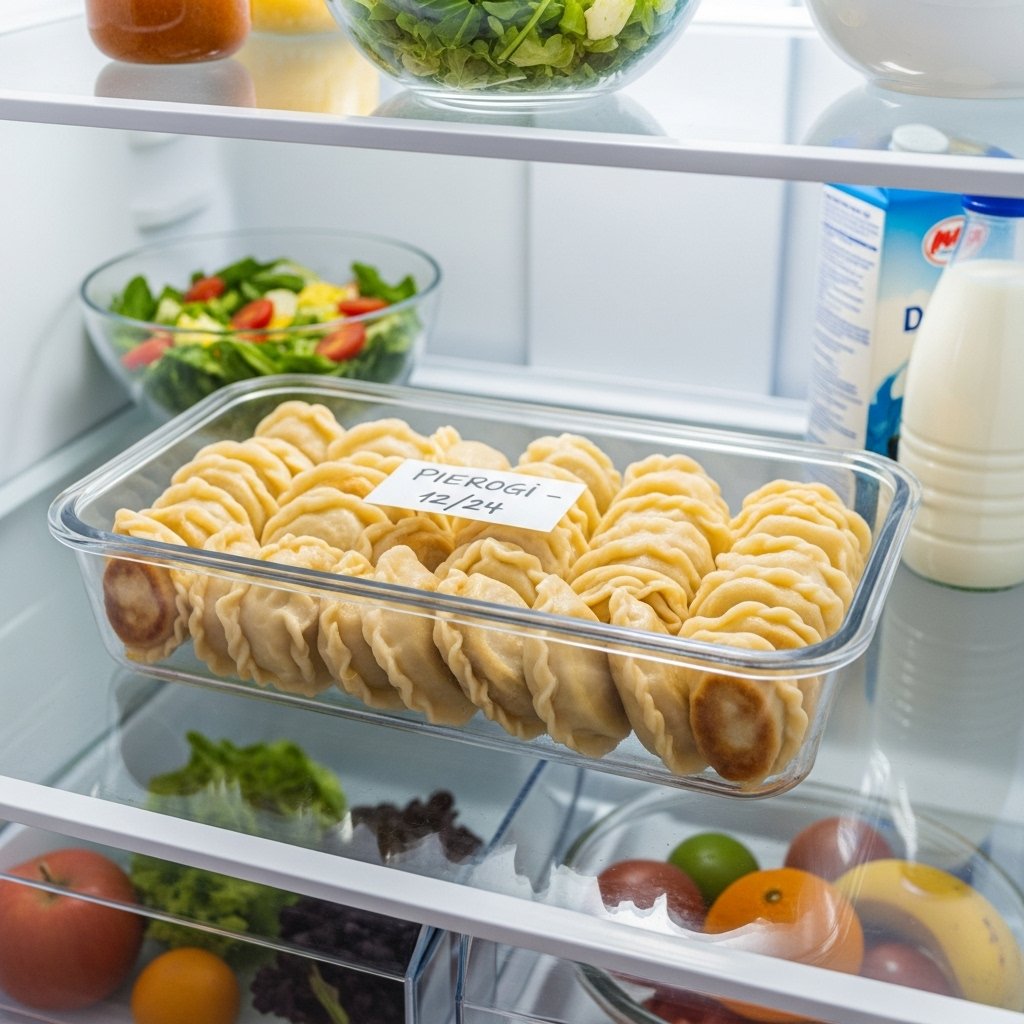
For short-term use, proper pierogi storage means refrigerator storage in an airtight container. I manage cooked pierogi storage separately from dough storage, wrapping dough as plastic wrap dough and keeping it in the fridge up to 3 days.
I also handle filling storage as separate storage, following shelf life tips to keep flavors fresh.
Freezing for Later Use
When freezing pierogi, both cooked pierogi freezing and uncooked pierogi freezing work well. I arrange them in single layer freezing on a floured tray, then move them to freezer bag storage. I also allow freezing dough and freezing filling separately.
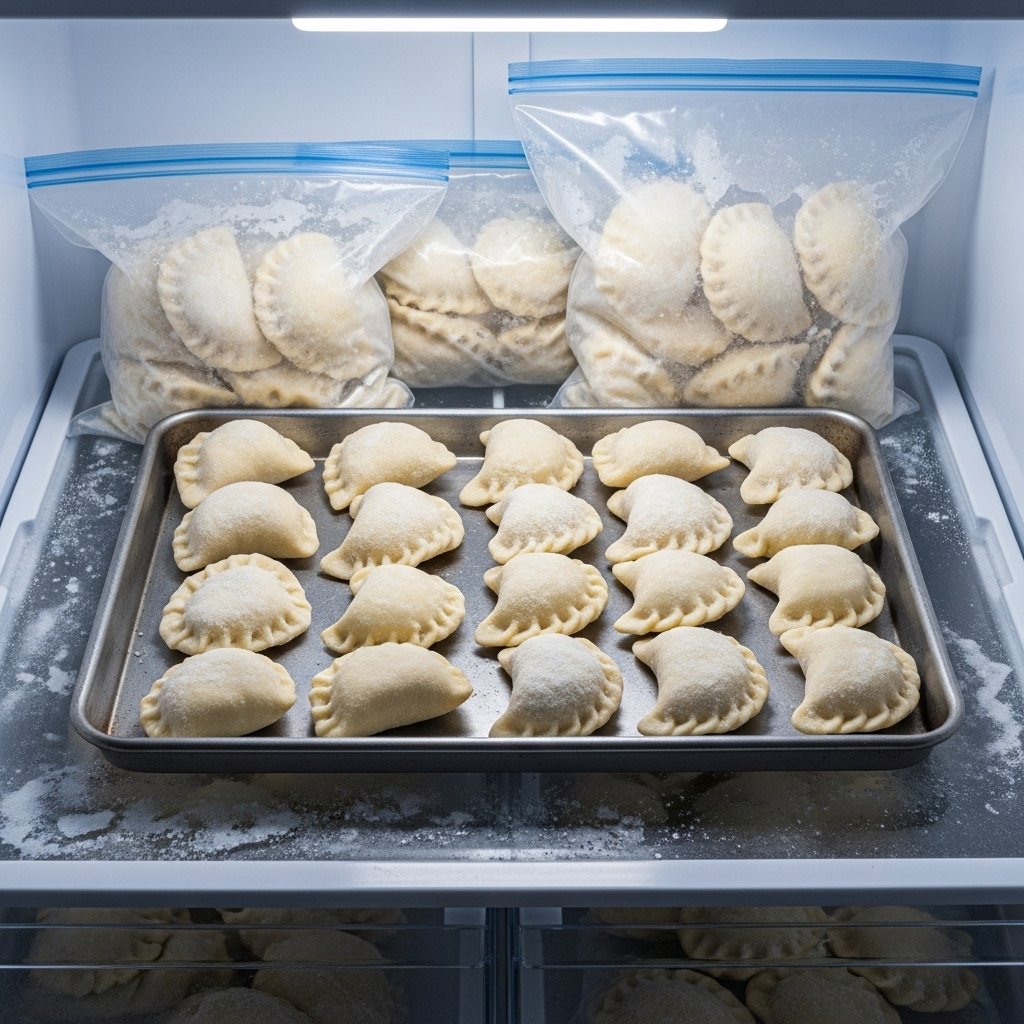
For reheating, cooking frozen pierogi directly by boiling from frozen works best, as long as basic freezing tips are followed.
Flavor Variations to Explore
Beyond classics, I enjoy cheddar pierogi and American style pierogi. Traditional options like sauerkraut and mushroom pierogi or meat pierogi remain popular, while fruit pierogi, blueberry pierogi, cherry pierogi, and other sweet pierogi add contrast.

For modern diets, vegetarian pierogi, vegan pierogi, and other filling variations keep the recipe flexible.
Practical Recipe Notes
I always watch the dough to filling ratio, since rolling thickness importance affects texture. For efficiency, leftover dough usage includes dough scraps cooking or pasta dough reuse. When issues arise, I review kneading issues and tough dough reasons.
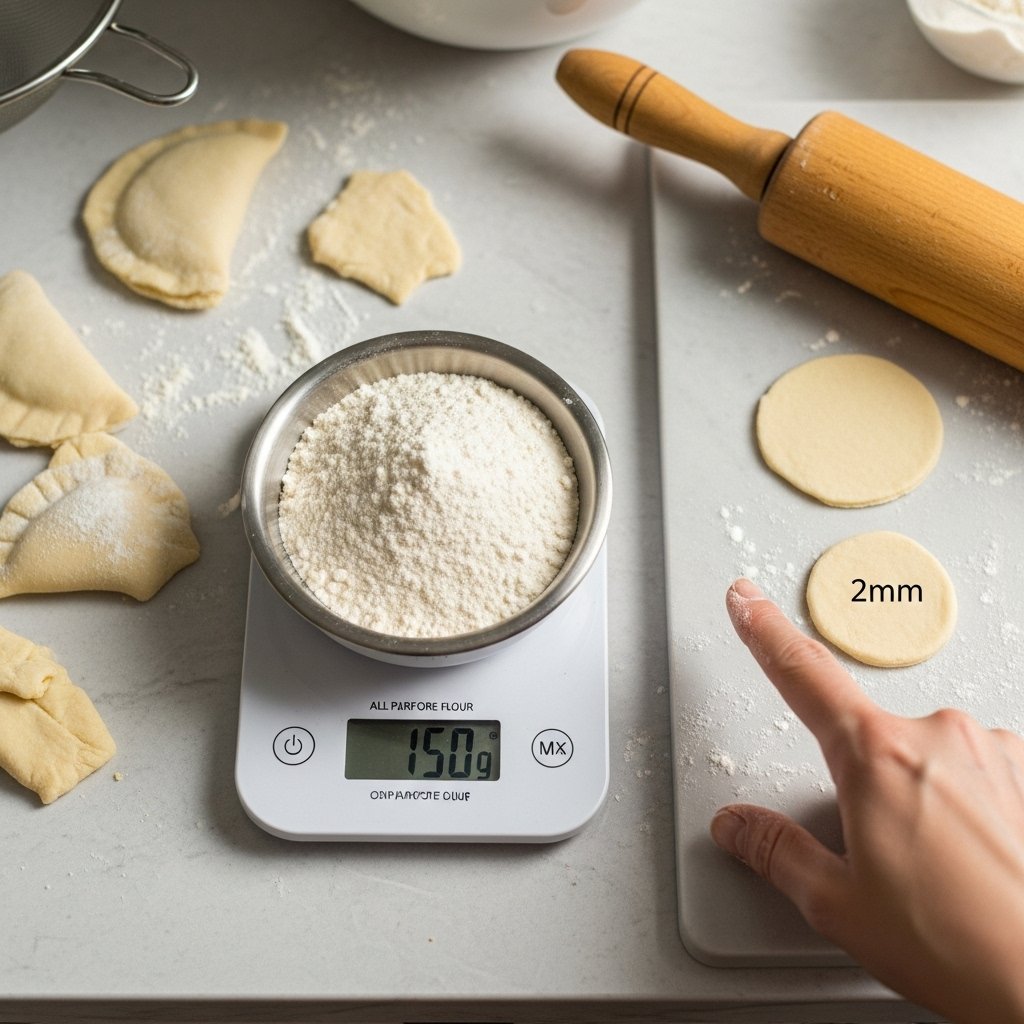
Accuracy matters, so measuring flour accuracy with kitchen scale usage improves results, along with small consistency adjustment tips.
Frequently Asked Questions
What are potato and cheese pierogi called in Poland?
Potato and cheese pierogi are called pierogi ruskie in Poland. The name comes from the Ruthenian region, not Russia. These pierogi are a classic part of traditional Polish cuisine and are considered everyday comfort food.
Can I use cheddar cheese instead of twaróg cheese?
Yes, you can use cheddar cheese, but the taste will be different. Twaróg cheese or farmer cheese gives pierogi their authentic flavor. Cheddar makes them richer and more American-style rather than traditional.
Why is my pierogi dough tough or dense?
A tough dough usually means it was not kneaded enough, did not rest long enough, or had too much flour. Using warm water, resting the dough properly, and kneading until elastic dough forms helps fix this issue.
How do I know when pierogi are fully cooked?
Pierogi are ready when they float to the top of the water and cook for 1–3 more minutes. This ensures the dough is cooked through without becoming too soft.
Can I freeze potato and cheese pierogi?
Yes, you can freeze both uncooked pierogi and cooked pierogi. Freeze them in a single layer first, then store in a freezer bag. They can be boiled directly from frozen without thawing.
How long can pierogi be stored in the fridge?
Cooked pierogi can be kept in the refrigerator for up to 2–3 days in an airtight container. Dough and filling should be stored separately for best results.
What is the best way to reheat pierogi?
The best reheating method is pan-frying in butter until golden. You can also reheat by boiling briefly, but pan-frying gives better texture and flavor.
Are pierogi Polish or German?
Pierogi are traditionally Polish, but they are also popular across Eastern Europe. Their history dates back centuries, making them a shared regional dish, though Poland is most closely associated with them.