
Understanding Pierogi Basics
Pierogi (often called pierogies) are traditional Polish dumplings and one of the most loved Eastern European stuffed dumplings. They are made with unleavened dough and usually cooked as boiled dumplings, though many people also enjoy pan-fried dumplings for extra texture. These are classic traditional foods with many regional varieties, ranging from sweet fillings to savory fillings, including meat fillings and meatless fillings. One of the most popular versions is potato and cheese pierogi, also known as vegetarian pierogi, and commonly referred to as Polish pierogi.
When making Pierogi Ruskie in a Thermomix, this understanding helps a lot. Knowing how soft the dough should be and how the filling behaves makes cooking smoother and more predictable, especially when you want consistent results.
Pierogies Ruskie – Cooked – Thermomix in Polish Food Culture
The pierogi popularity in Poland is unmatched, and they are among the most recognized Polish dishes. They can be served as a main dish or as a side dish, depending on the filling and occasion. Alongside potato and cheese pierogi, you’ll often find sauerkraut and mushroom pierogi, meat filling pierogi, and sweet pierogi made with fruit fillings like strawberries and blueberries, especially as summer pierogi.
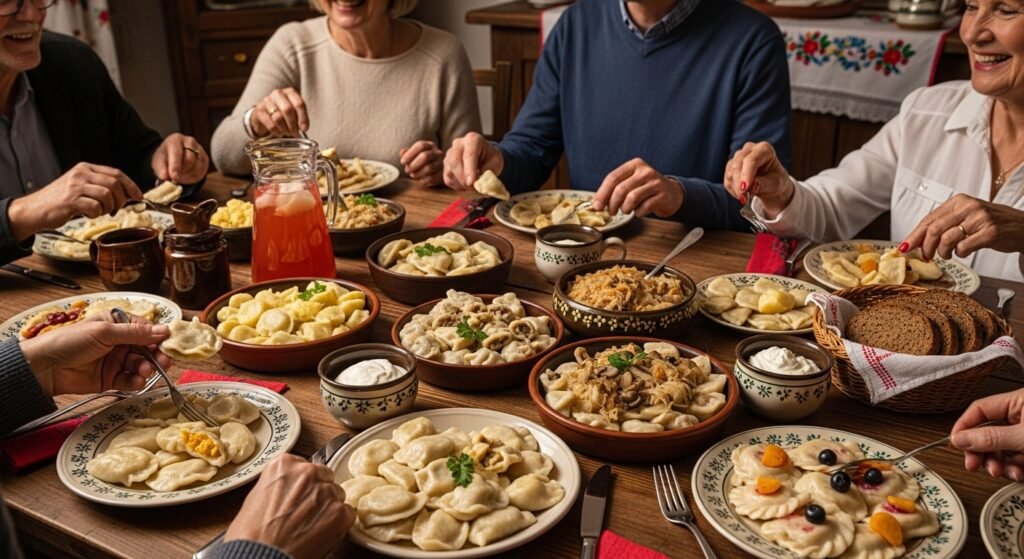
In Poland, there are even dedicated places called pierogarnia, which is essentially a pierogi restaurant focused entirely on different regional varieties. This deep cultural presence is what makes recipes like Pierogi Ruskie perfect for adapting to modern tools like the Thermomix.
Pierogi vs Pierogies: The Correct Name
The pierogi correct name is simply “pierogi,” even when talking about more than one. The term pierogies incorrect term is common in English-speaking countries, as is the perogies spelling, but neither is accurate. In Polish, the singular pieróg refers to one dumpling, while the plural pierogi is grammatically correct.

This English naming confusion often leads to mistakes, but sticking to proper terms shows respect for Polish language accuracy and tradition, especially when sharing authentic recipes like Pierogi Ruskie.
Pierogies Compared to Other Dumplings
Many people compare pierogi vs ravioli, but they are quite different. Italian dumplings like ravioli use pasta dough that usually includes eggs, resulting in egg dough that is firmer and often tougher dough overall. The Italian fillings also follow different flavor profiles.Pierogies Ruskie – Cooked – Thermomix
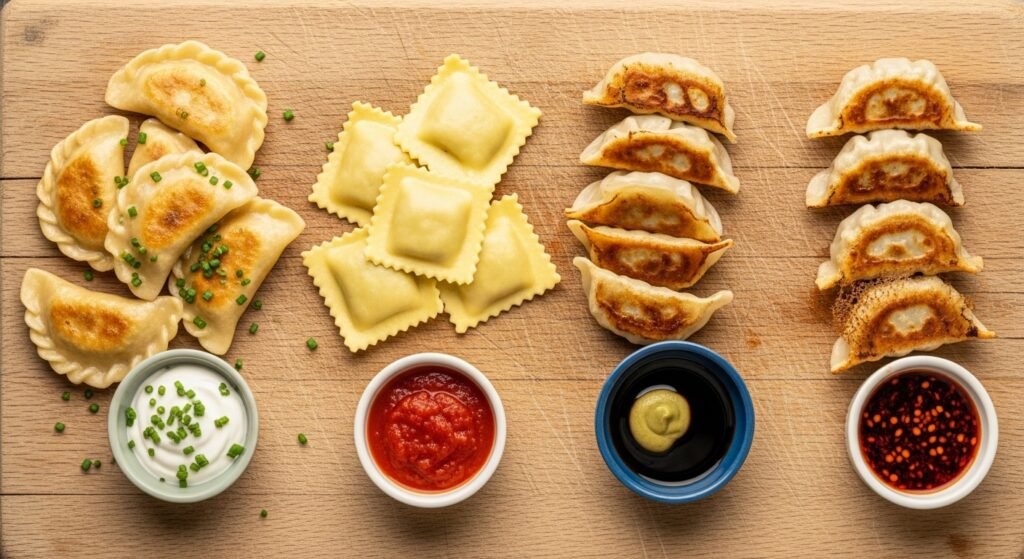
When you look at a gyoza comparison or Chinese potstickers comparison, pierogi still stand apart. They have a thicker wrapper and a richer filling, which is why potato-based Pierogi Ruskie feel more filling and comforting, especially when cooked and finished properly.
Tips for Perfect Pierogi Dough
Making perfect pierogi dough doesn’t require complexity. A traditional pierogi dough is something Polish grandmothers often make by feel, focusing on dough consistency rather than strict measurements. Small adjustments like adding water or adding flour as needed are normal, though using a kitchen scale helps with fast preparation and repeatable results. Proper kneading importance and allowing dough resting time lead to softer dough that becomes pliable dough.
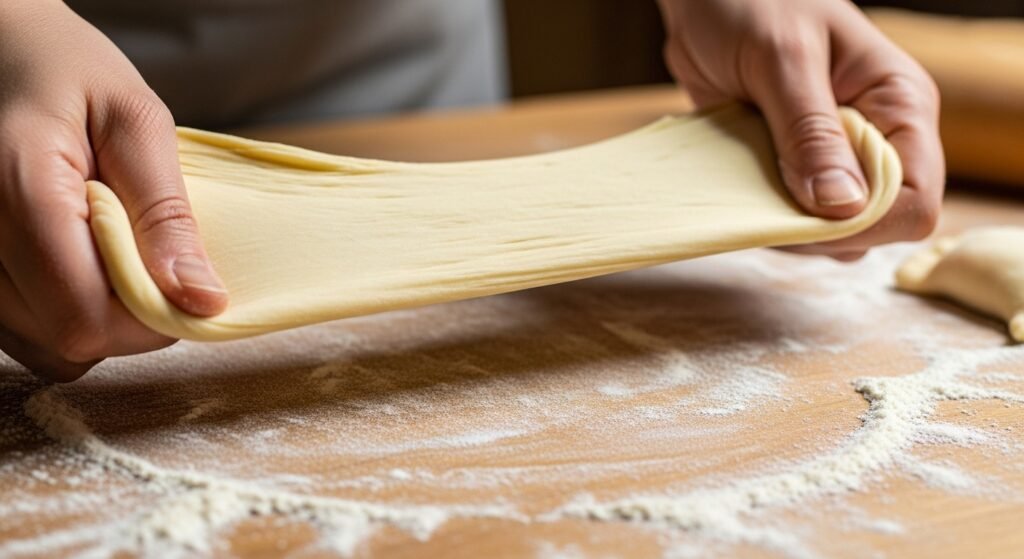
Using the right hot water temperature and adding butter fat or oil fat improves texture, while many cooks prefer no eggs for tenderness. Finding the right dough to filling ratio matters too, whether you lean toward a thick dough preference or a thin dough preference. With a Thermomix, these steps become easier and more consistent, especially for Pierogi Ruskie.
Dough Ingredients for Soft Pierogies
The base of Pierogi Ruskie starts with pierogi dough ingredients that are simple but very precise. I usually rely on all-purpose flour or plain flour, mixed with hot water or warm water, paying close attention to water temperature, ideally around eighty to ninety celsius, because this helps activate the dough properly. Adding butter fat gives richness, while vegetable oil is a good alternative, along with proper salt seasoning to balance flavor. This classic flour water salt dough can include an optional egg, though some cooks discuss the sour cream debate for extra softness.
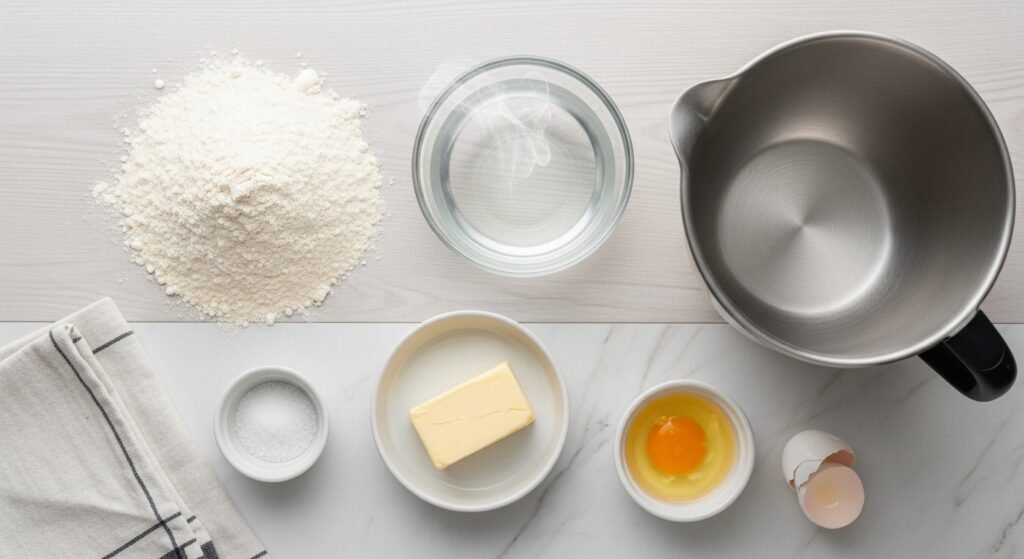
For special needs, the same method works with gluten free flour or gluten free all purpose flour, especially when using a Thermomix, which keeps mixing even and controlled. From experience, measuring carefully makes a big difference in texture and consistency.
Egg or No Egg in Pierogi Dough
Choosing between egg-free dough and dough with egg changes the final texture. Dough made with eggs often results in a tougher dough, while a well-kneaded dough without eggs feels softer and easier to roll. Many home cooks avoid eggs for hygiene reasons, especially due to raw egg concern and child safety when kids help in the kitchen.Pierogies Ruskie – Cooked – Thermomix
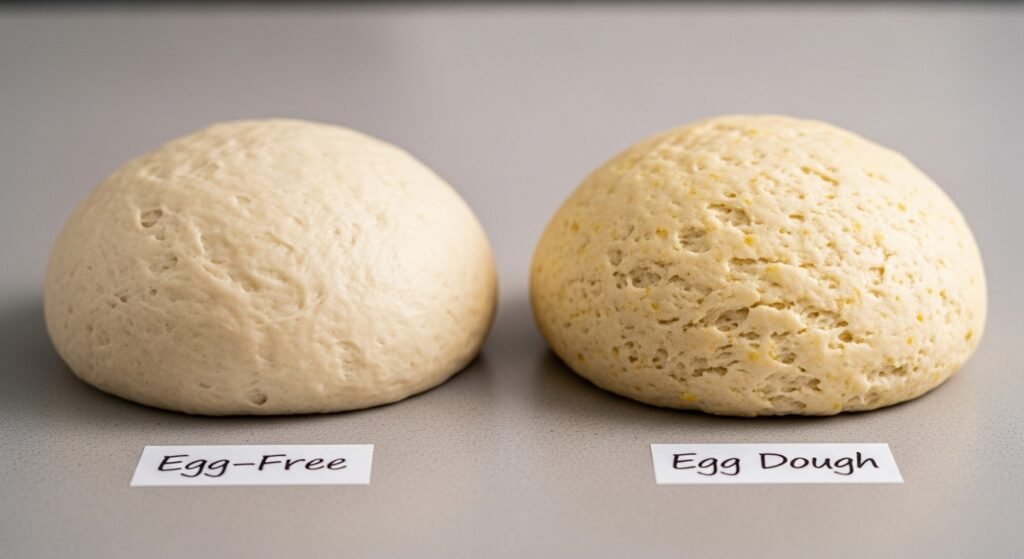
An eggless version suits a vegetarian diet, vegan diet, dairy-free diet, and egg-free diet, especially if you use butter substitution like vegetable oil. I personally prefer egg-free dough in the Thermomix because it stays flexible and forgiving.
Tools That Make the Job Easier
Good results depend on the right equipment needed. A stand mixer like kitchen aid speeds things up, but hand kneading for about ten minutes kneading also works well. You can even use a food processor fitted with a dough blade. For rolling, a rolling pin or wine bottle alternative does the job, while a pasta maker with a pasta attachment helps achieve even thickness.
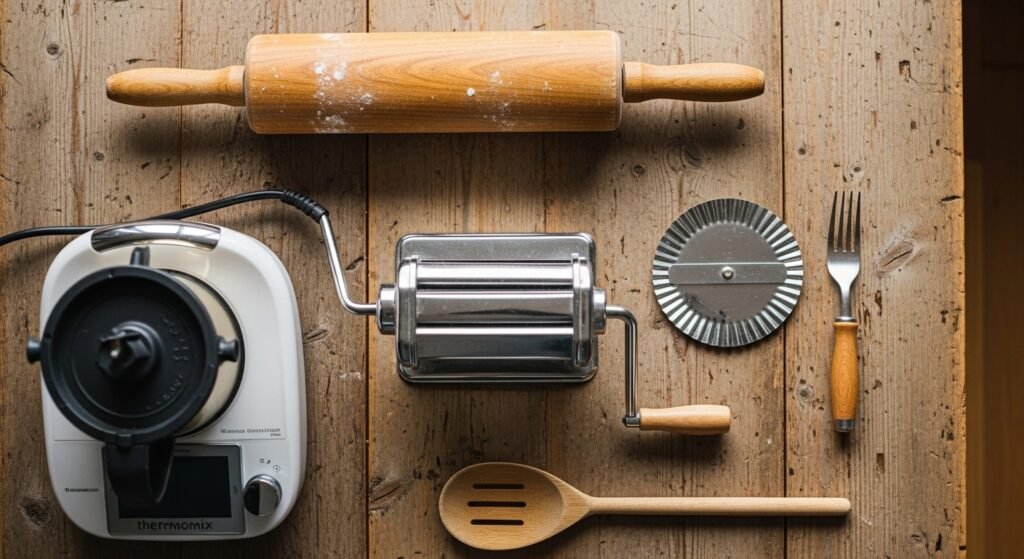
For shaping, a pierogi cutter, pastry cutter, sharp-edged cup, or even a regular glass works. Some people like a pierogi press or pierogi molds, though I rarely use them. Cooking needs a large pot, slotted spoon, or skimmer, and finishing in a cast iron pan adds great texture.
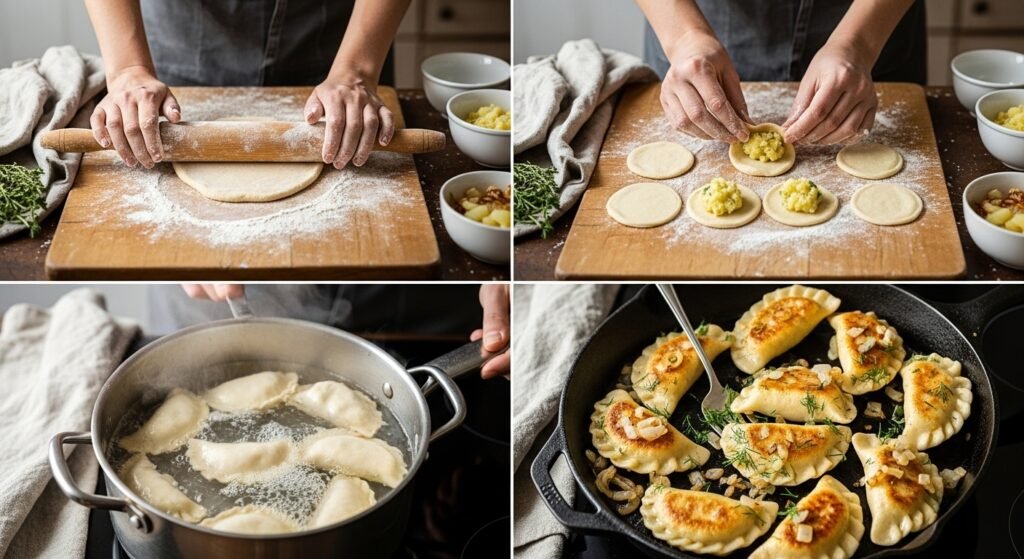
Making Pierogi Dough Step by Step
The step by step dough process begins with a flour and salt bowl, followed by adding hot water with butter and wooden spoon mixing until a rough dough forms. After kneading dough, it turns into a smooth dough, then a soft dough, and finally an elastic dough that rests well before use.Pierogies Ruskie – Cooked – Thermomix
Once ready, you move on to filling preparation, rolling dough, cutting rounds, and carefully shaping pierogi. With a Thermomix, these steps feel more controlled, and the dough stays consistent from start to finish.
Flour Measurement That Actually Works
Getting the dough right starts with measuring flour, and from experience, a kitchen scale gives the most consistent results. Volume measurement can vary a lot compared to weight measurement, which is why measuring cups inaccuracy matters. One cup can weigh one hundred twenty grams or even one hundred forty grams, creating a big tablespoon difference. The safest approach is the spoon and level method with proper cup leveling, especially when switching between a european cup and a us cup.
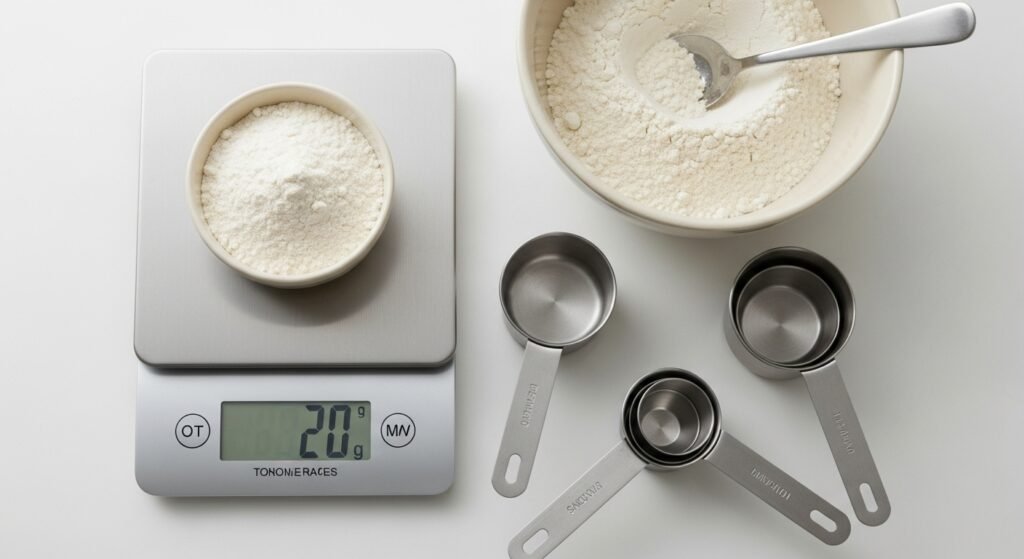
When I moved to weighing ingredients, the dough texture became predictable every time, which is especially helpful when using a Thermomix for Pierogi Ruskie.
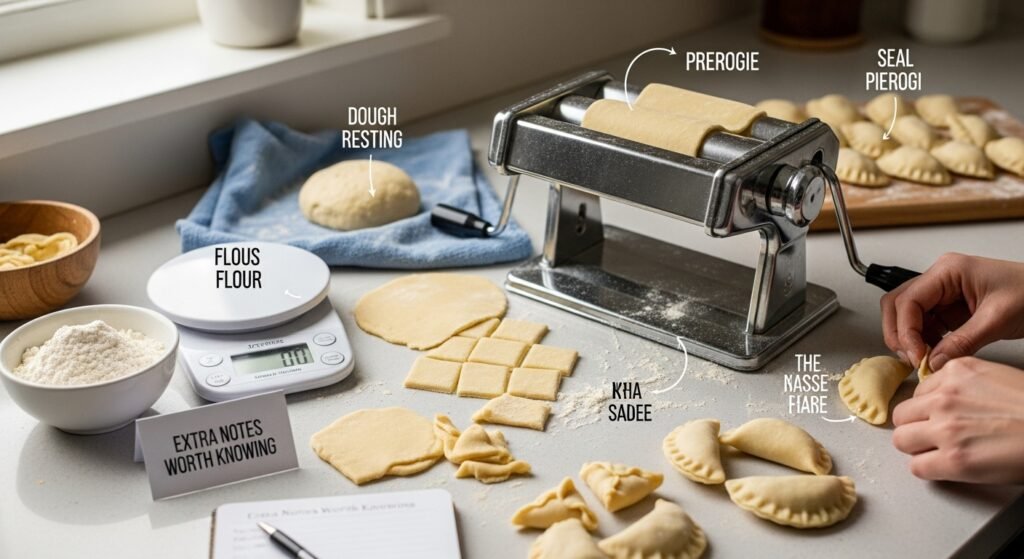
Rolling Dough with a Pasta Machine
For smooth results, pasta machine rolling works beautifully, especially with a kitchen aid pasta roller set to setting four, even if you don’t strictly follow manufacturer instructions. Egg-free dough rolling is easier when the dough is at room temperature dough, lightly floured dough, and gently flattened with a pre-rolling pin.Pierogies Ruskie – Cooked – Thermomix
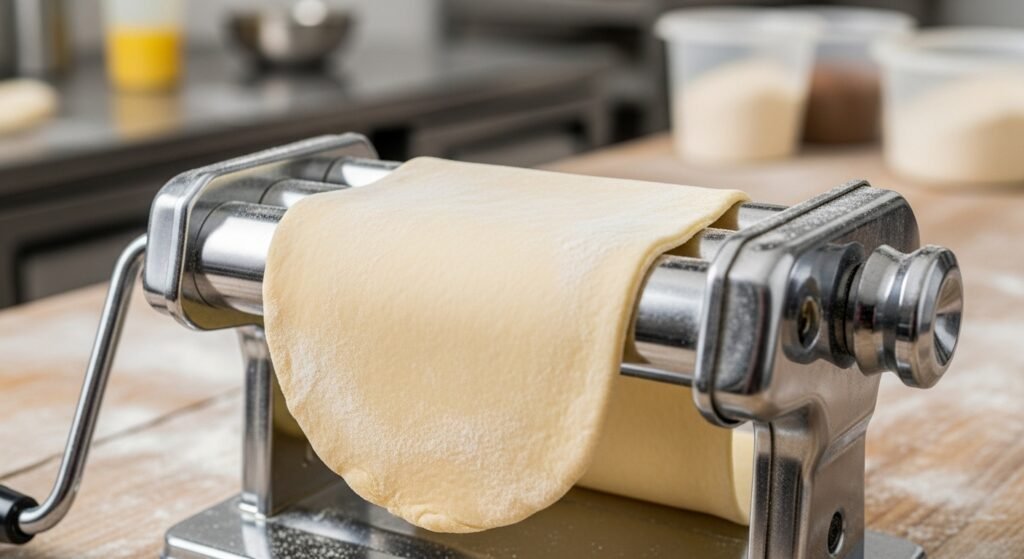
A clean, smooth dough surface helps prevent tearing, and once you get the feel for it, rolling pierogi dough becomes fast and relaxing.
Filling Preparation Ideas
The heart of Pierogi Ruskie is the different pierogi filling . A classic cheesy filling blends into a buttery filling made from creamy mashed potato, combining potato filling, cheese filling, and butter filling. Traditionally this uses quark cheese, a european cottage cheese, though a cottage cheese substitute like cheddar cheese or shredded cheese works very well.
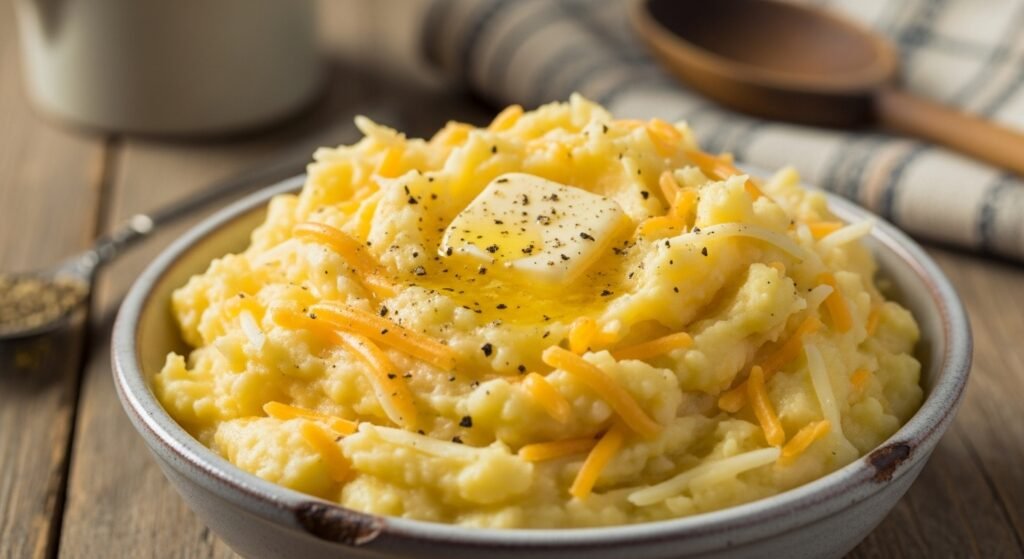
Over time, I’ve also tried spinach filling, cranberry filling, sweet potato filling, sauerkraut filling, and even irish colcannon, which shows how flexible these creative fillings can be.
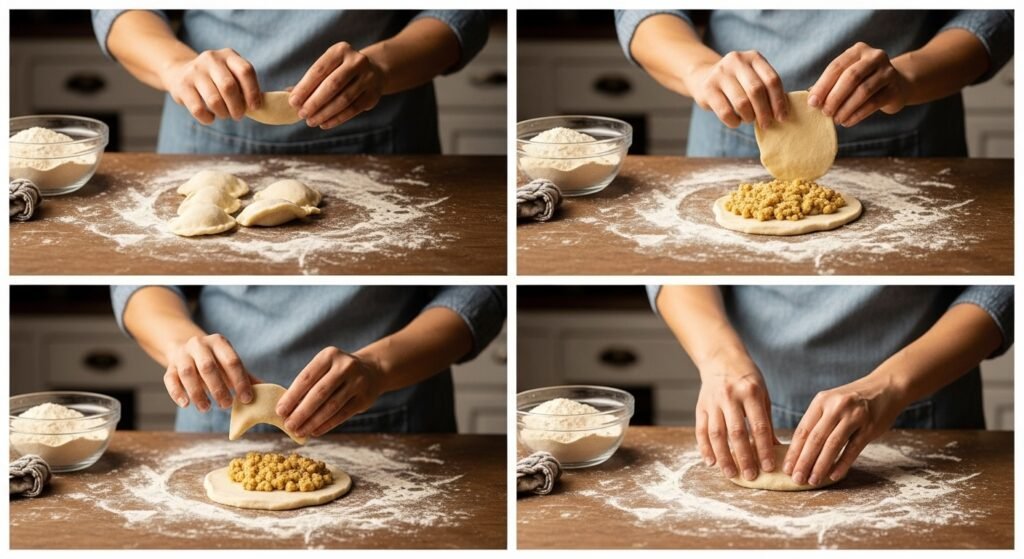
Shaping the Pierogis
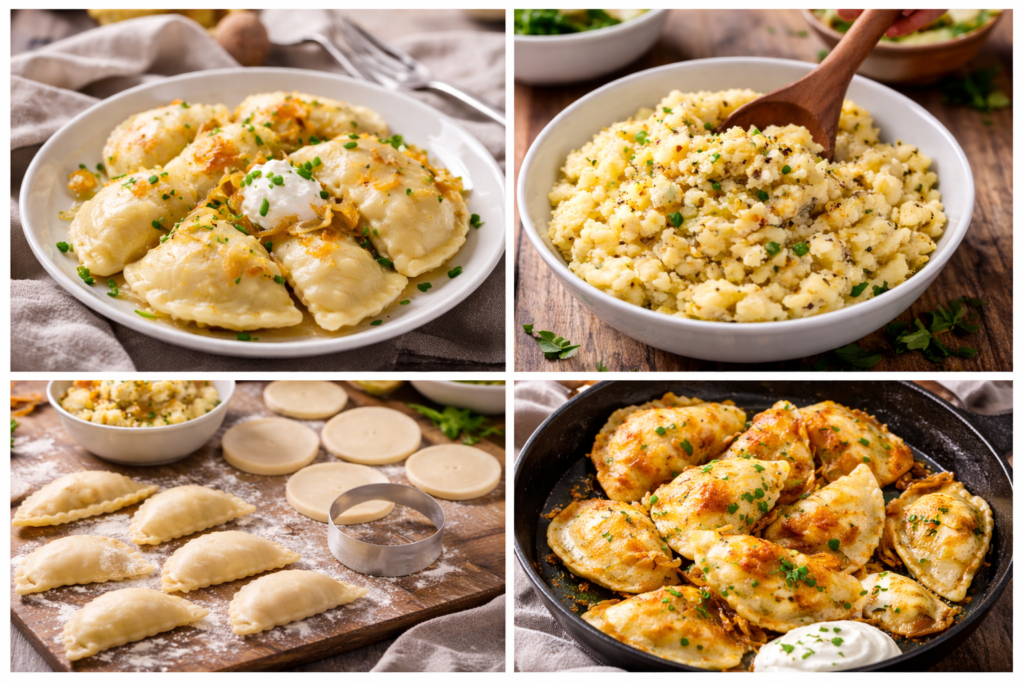
The process starts with rolling dough into thin dough at three millimeter thickness or one eighth inch thickness. Use a round cutter or glass cutter, save the surplus dough, and begin wrapping pierogis. Each one gets tablespoon filling, a little water for water sealing edges, then folding dough, pressing edges, and fork sealing to form the traditional pierogi shape.

With batch wrapping, yields can vary from thirty pierogis yield to forty pierogis yield, or even one hundred pierogis yield, depending on size.Pierogies Ruskie – Cooked – Thermomix
Cooking Pierogis Properly
Boiling pierogis is much like boiling like pasta, but always use an uncrowded pot and focus on batch cooking in salted boiling water. When floating pierogis rise, they’re nearly done—usually five minutes cooking or six to seven minutes cooking. Always reserve cooking water because this starch water helps with butter sauce thickening later.
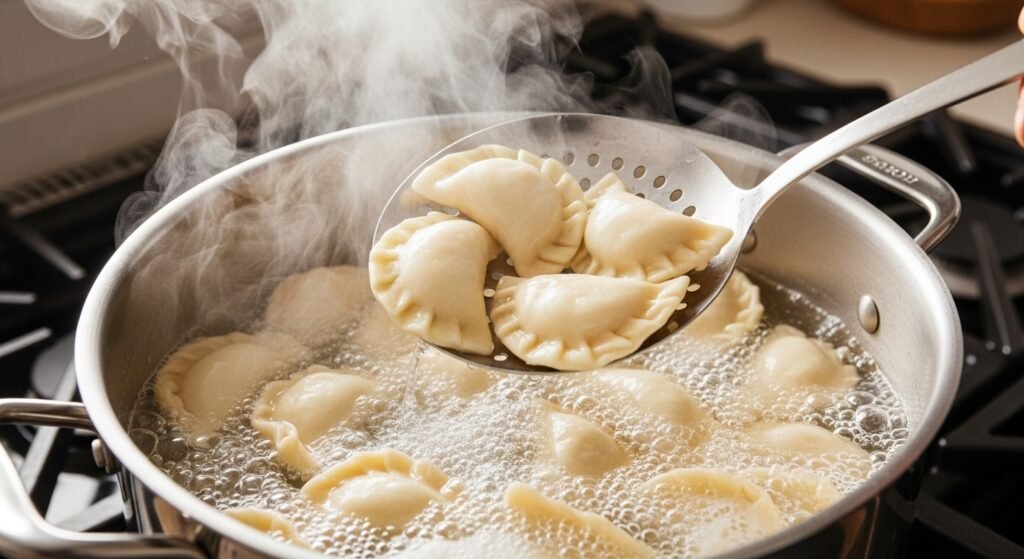
Lift them with a slotted spoon transfer, allow colander draining, and if desired, finish with a pan frying option using butter frying for extra flavor.
Managing Big Batches
For large batch cooking, always keep a single layer boiling to ensure sticking prevention and uneven cooking prevention. Limit to boiling twelve pierogis max, then continue batch boiling and let them rest with tray resting.Pierogies Ruskie – Cooked – Thermomix
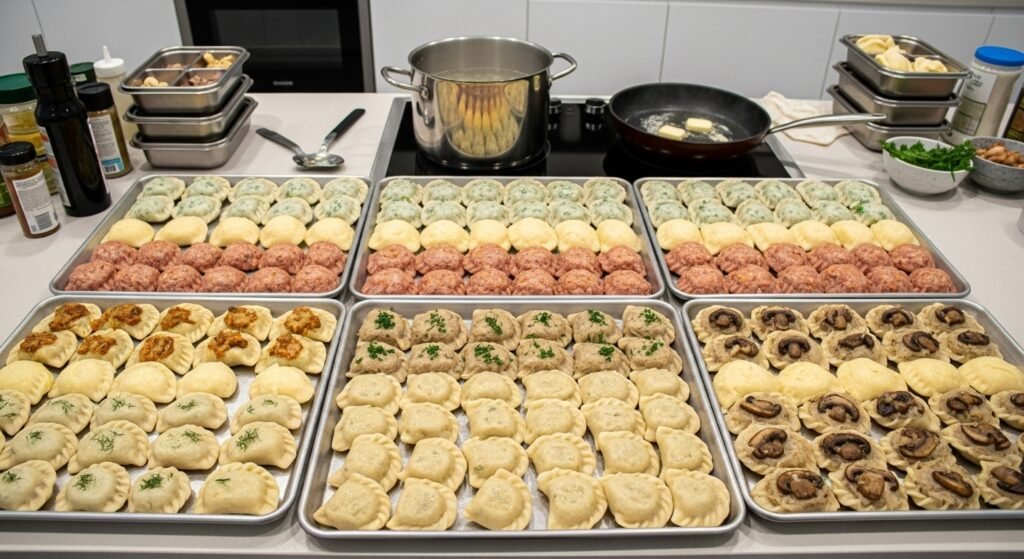
To finish, try reheating pierogis with butter tossing, either in large skillet tossing or large pot tossing, ensuring even sauce coating. For parties, the gigantic batch method saves time and stress.
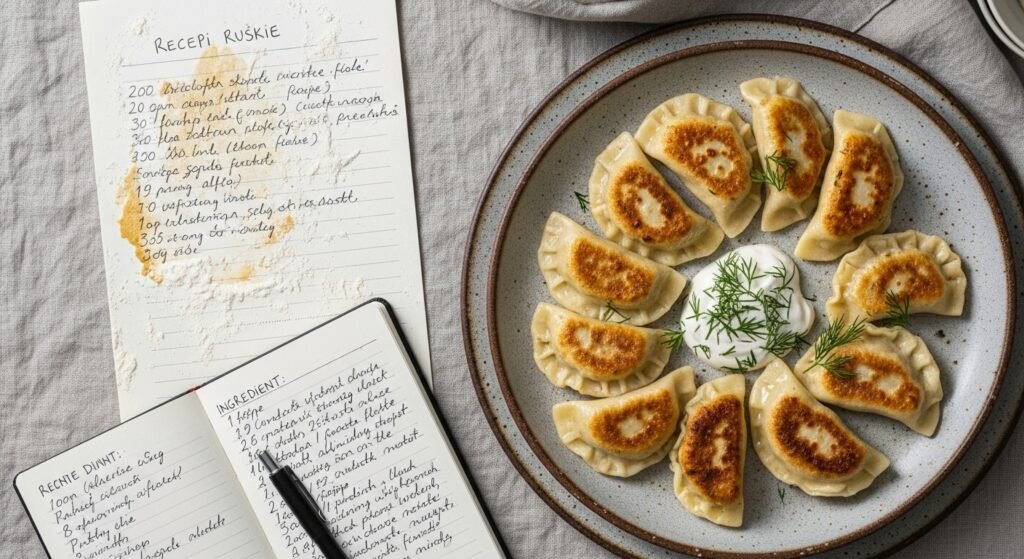
Serving Pierogis the Right Way
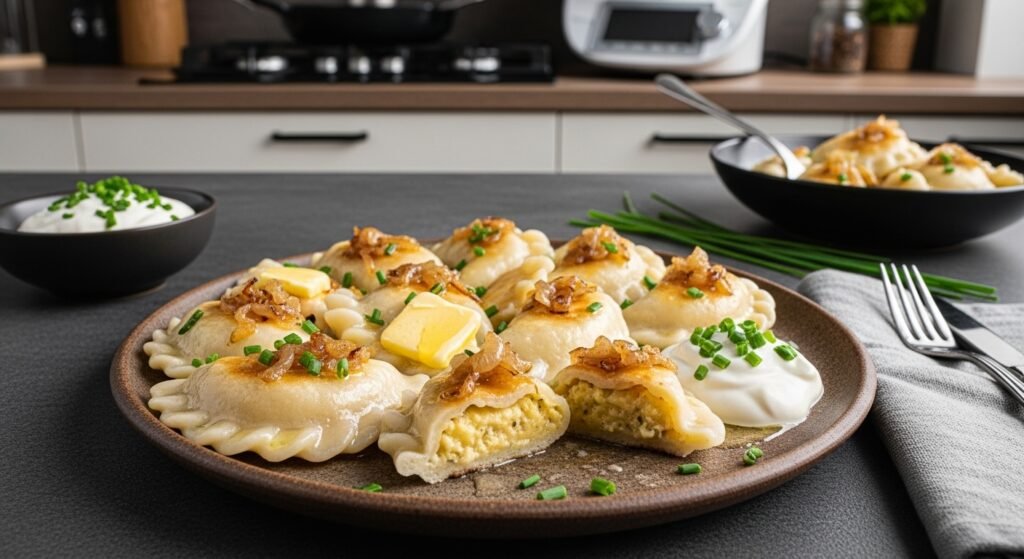
When serving pierogis, classics like sour cream topping and melted butter topping never fail. Add caramelized onions or sautéed onions, crispy bacon topping, plus parsley garnish or chives garnish. I also like spinach serving with onion mushroom sauté for balance.
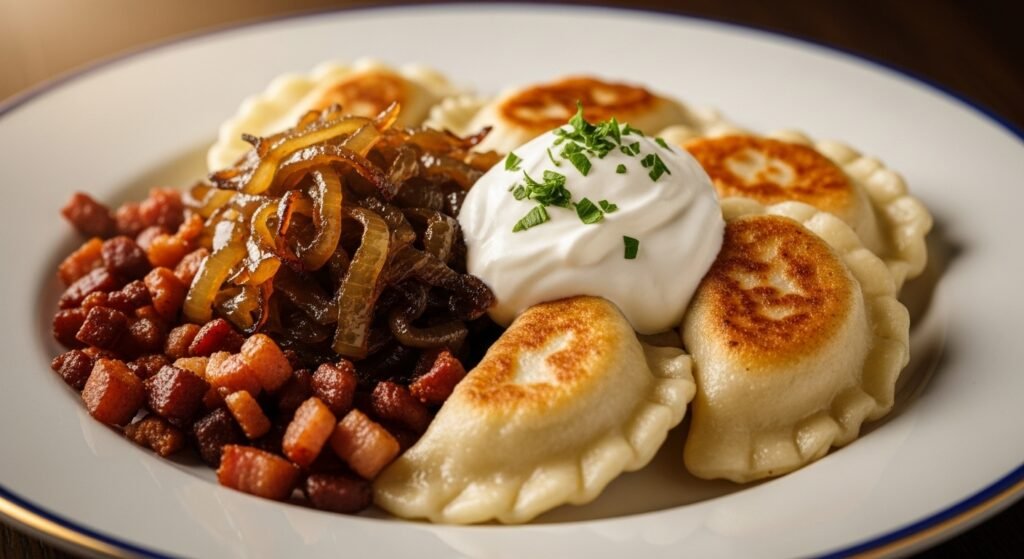
For a lighter plate, include fresh greens side, a simple leafy salad, or other creative accompaniments that cut through the richness.Pierogies Ruskie – Cooked – Thermomix
Keeping Pierogi Fresh at Home
Storing pierogi properly makes a big difference in taste and texture. After cooking, a light melted butter coating or oil coating helps prevent sticking before placing them in an airtight container for refrigerator storage. They keep well for two days storage or even three days storage, and I often enjoy pan-frying leftovers because they crisp up nicely. Still, I admit a strong fresh pierogi preference, so I usually plan partial batch cooking to avoid excess.best sauces for pierogies
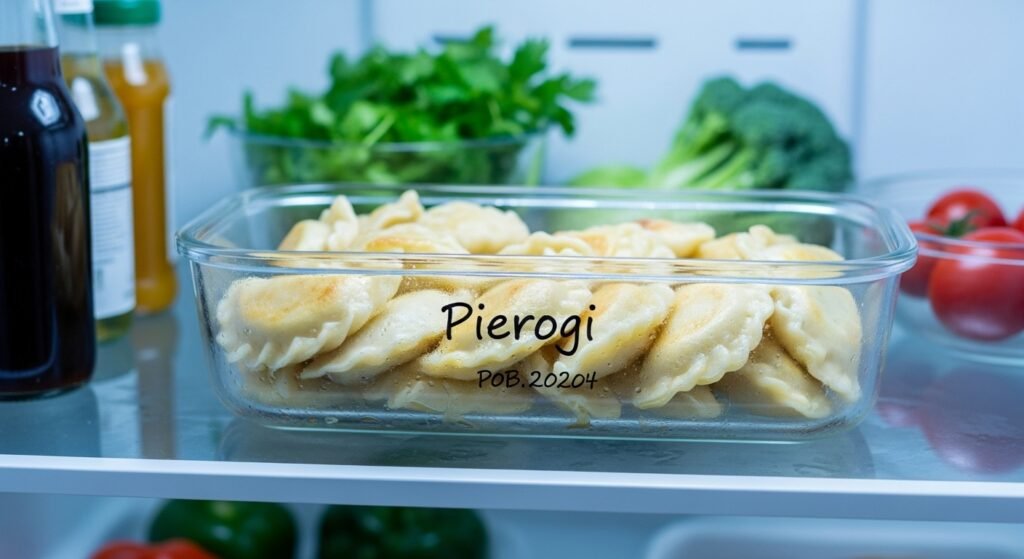
If you prepare ahead, dough refrigeration and filling refrigeration work well when wrapped in plastic foil wrapping. Don’t worry if you notice a gray dough color the next day; it’s normal and doesn’t affect flavor.
Freezing Pierogi the Right Way
Freezing pierogi is very practical for busy weeks. You can do cooked pierogi freezing or uncooked pierogi freezing, as long as you use tray freezing on a flour sprinkled tray so you get non-sticking dumplings. Once frozen, move them to plastic bags, containers, or freezer bag storage, using parchment paper separation or wax paper separation if stacking.Pierogies Ruskie – Cooked – Thermomix
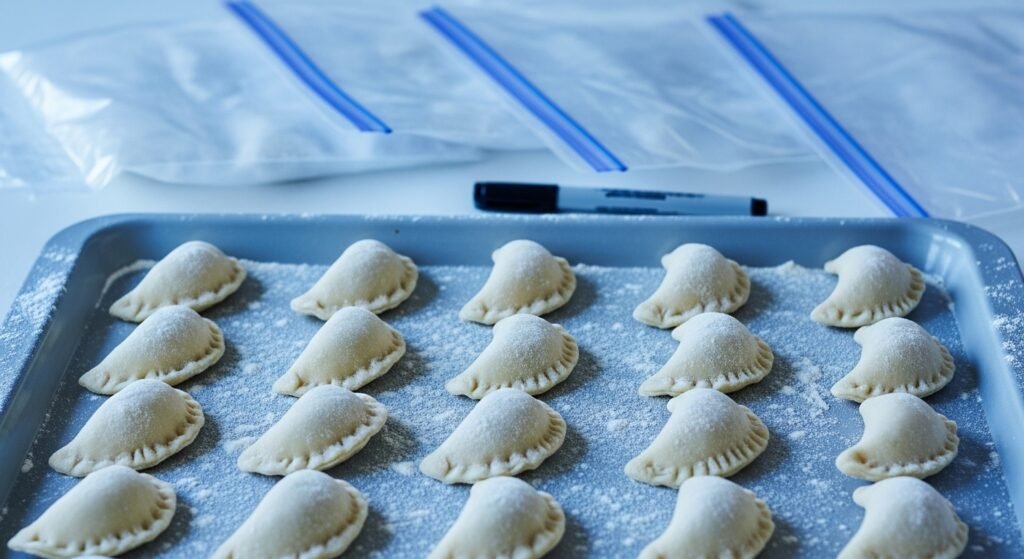
When ready, boiling from frozen works best, but only cook seven to eight frozen pierogi at once to avoid water temperature drop, which can cause bursting pierogi.
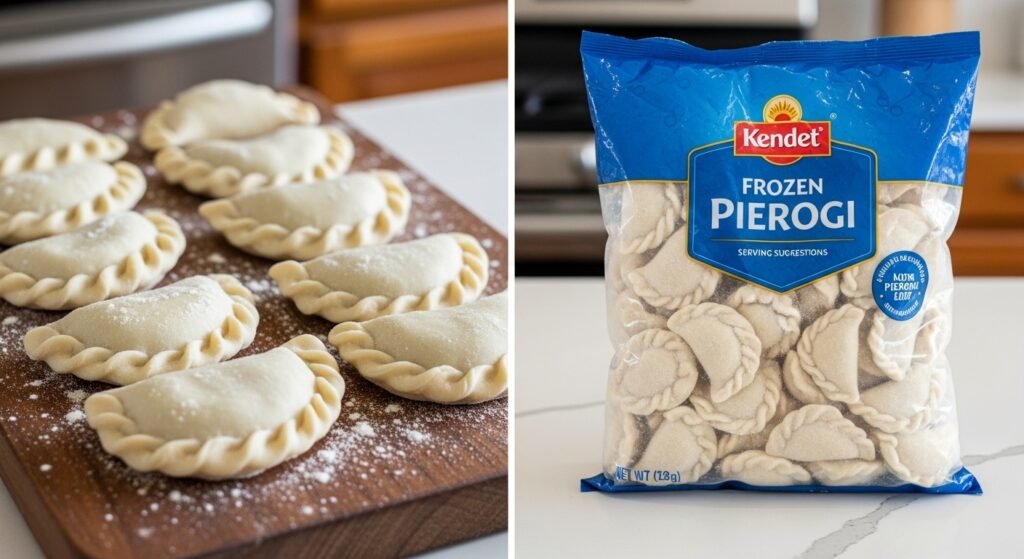
About Store-Bought Frozen Pierogi
In my experience, store-bought pierogi often have thick dough because they’re factory made pierogi and machine filled pierogi. They’re convenient, but there’s a clear taste comparison when you’ve tried homemade. I still lean toward a strong homemade pierogi preference, especially for Pierogi Ruskie made in a Pierogies Ruskie – Cooked – Thermomix.
Recipe Snapshot and Background
This recipe for pierogi ruskies brings together classic polish dumplings with modern methods. It connects ideas from a gluten free pierogi recipe and the best pierogi dough recipe, focusing on soft dough, elastic dough, and a light buttery aroma. Influences come from author aleksandra, author nagi, and author jules shepard, with flexible prep time, cook time, resting time, and total time.
Depending on size, yields range from thirty pierogis servings, forty pierogis servings, to one hundred pierogis yield, with adjusted calories, ratings, and reviews, all rooted in polish cuisine and broader european cuisine.
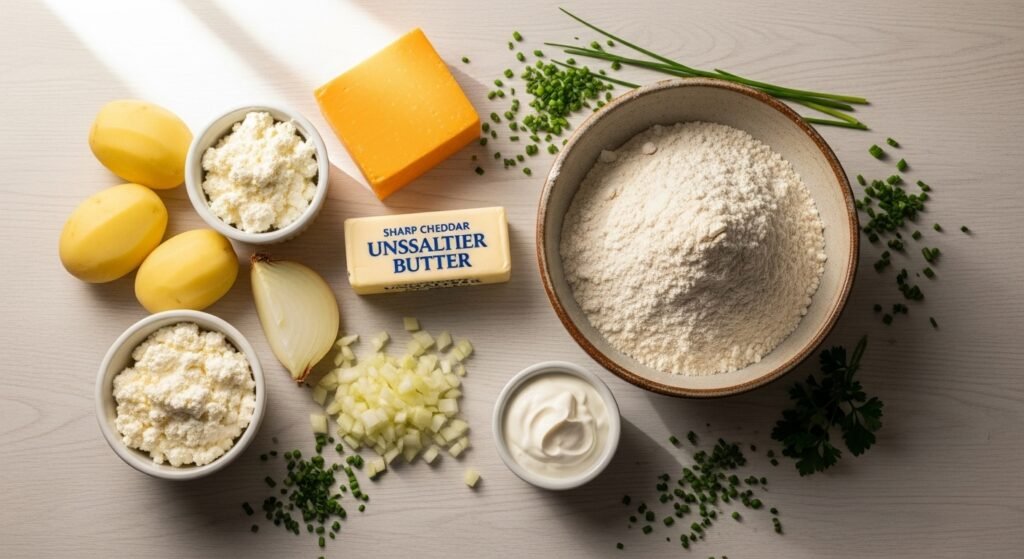
Ingredients Overview
The core pierogi ingredients include simple pierogi dough ingredients like flour or gluten free flour, water, butter, or vegetable oil, plus egg or egg substitute. For the filling, you’ll need potatoes, cheese, salt, pepper, and onion, with toppings like sour cream, parsley, and chives.
Cooking Instructions in Flow
Start by mix flour salt, then heat water butter and pour hot liquid into the bowl, using wooden spoon mixing before you knead dough and rest dough. Next, divide dough, roll thin dough, cut rounds, fill pierogis, and seal edges.
To cook, boil pierogis until the float test passes, then use slotted spoon removal, finish with butter sauce tossing, try a pan fry option if desired, and finally serve pierogis warm.
Extra Notes Worth Knowing
Expect cooking time variation depending on dough thickness and dough filling ratio. Smart leftover dough usage, good storage tips, and proper freezing methods save time later. Tools like pasta machine rolling help with consistency, while cup measurement differences explain pierogi quantity variation.
FAQs – Pierogi Ruskie (Cooked – Thermomix)
How do I make pierogi dough softer?
Pierogi dough becomes softer when it is kneaded well and then allowed to rest. Always give the dough at least 20–30 minutes to relax before rolling, especially when using a Thermomix.
Why do my pierogi stick together after cooking?
Pierogi usually stick when they are not coated properly. Toss freshly cooked pierogi with butter or a little oil while they are still hot to prevent sticking.
Should I boil pierogi before freezing them?
Yes, you can boil pierogi before freezing, but it’s optional. Both cooked and uncooked pierogi freeze well if they are placed in a single layer first.
Do I need to thaw pierogi before cooking?
No, thawing is not necessary. You can cook pierogi directly from frozen by adding them to boiling water and cooking a little longer.
How are pierogi traditionally served?
Pierogi are traditionally served with melted butter and sautéed onions. Sour cream is also very common, especially with Pierogi Ruskie.
Can pierogi be baked instead of boiled?
Yes, there is a baked pierogi option, though it’s less traditional. Baking gives a crisp texture, but boiling keeps them soft and tender.
Why are my pierogi all different shapes?
Uneven shapes usually happen when the dough is not rolled evenly or when filling amounts vary. This does not affect taste, only appearance.
What can I do with leftover pierogi dough?
Leftover dough pasta is a great idea. Cut the dough into strips and add it to soups or boil it like simple noodles.
Why does my pierogi dough turn tough?
Common tough dough reasons include using cold water, adding too much flour, or not letting the dough rest properly.
How thick should pierogi dough be?
Dough thickness preference depends on taste. Thin dough feels delicate and light, while thicker dough is more filling and chewy.
How long should I knead pierogi dough?
The ideal kneading time is about 5 minutes by hand or 3 minutes in a mixer. The dough should feel smooth and elastic.
Why does my dough keep shrinking when I roll it?
This elastic dough issue is caused by gluten development. Let the dough rest longer so the gluten relaxes before rolling again.