
Basic Dough and Techniques for Making Polish Pierogies
This is a tested Polish pierogi dough that rolls thin without breaking and cooks tender every time. When talking about basic pierogi dough and Polish pierogi dough(Best Pierogies Dough Recipe),it helps to start with a clear pierogi definition. Even the Merriam Webster definition describes pierogi as a dough case filled with a savory filling such as meat filling, cheese filling, or vegetable filling, then cooked as boiled pierogi or pan fried pierogi. I first understood this properly while visiting Polish festivals and Polish events, where pierogi are always present, from small stalls to full pierogi houses and even traditional bar mleczny or milk bars. Walking through Krakow Poland, it becomes obvious why homemade pierogi from a home kitchen pierogi setup are considered the best expression of Polish comfort food and Eastern European dumplings. When talking about pierogies we also ask what to serve with perogies, so menu lover helps all the things related to perogies.

From experience, the traditional technique matters as much as ingredients. The pierogi popularity worldwide exists because cooks respect dough importance, knowing that dough rise and fall, thin dough, and tender cooked dough define success. The right dough texture and dough consistency give pierogi their character, and the homemade dough advantage is full control over feel and elasticity. Once you understand how much the final result depends on dough quality, you never rush this step again.
Table of Contents
Types of Pierogi Fillings in Polish Cuisine
Classic Polish cooking is built around variety, which is why sauerkraut and mushroom filling is often called the traditional Polish filling and even the most Polish filling. Alongside it, ruskie pierogi with potato and cheese filling, also known as Ruthenian pierogi, dominate everyday meals. Sweet options like cherry pierogi and blueberry pierogi sit comfortably next to meat filled pierogi, showing how wide the spectrum of savory pierogi and sweet pierogi really is.
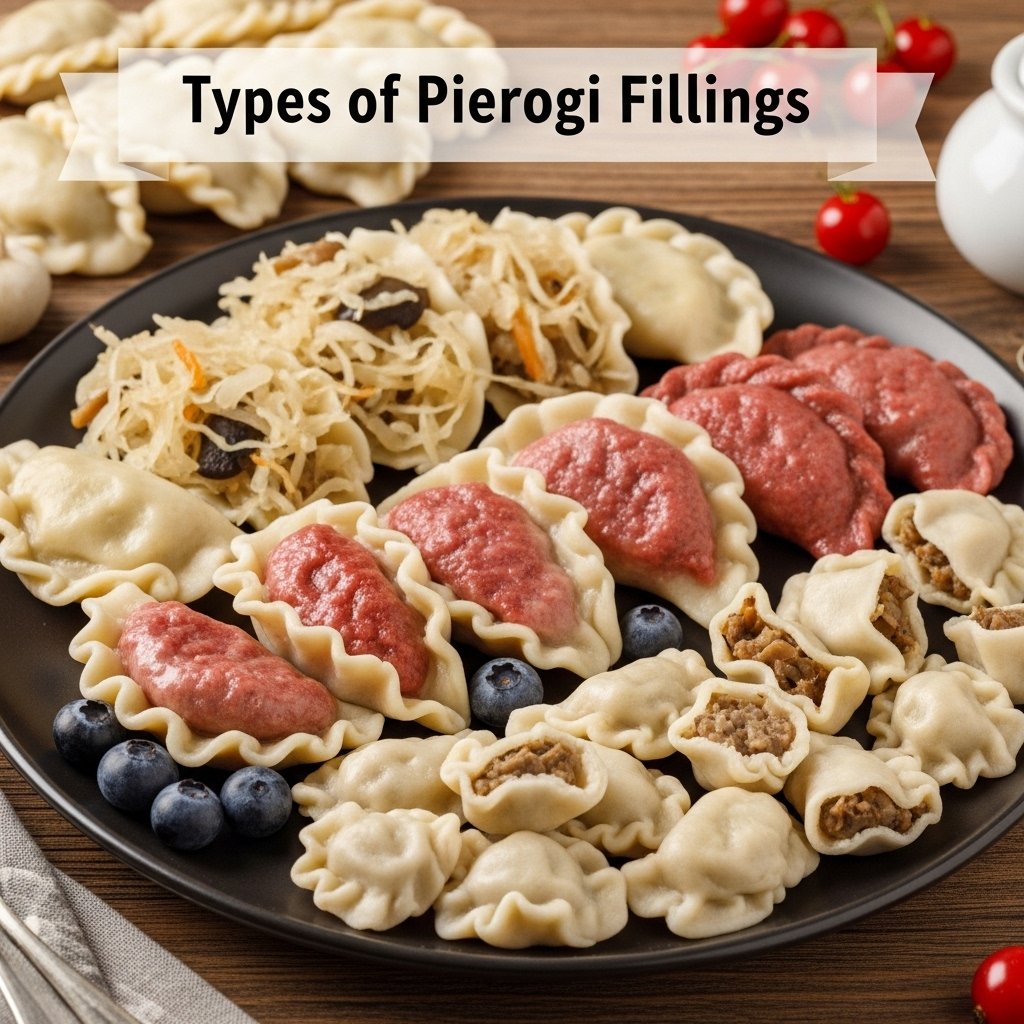
Special occasions highlight tradition even more. Uszka pierogi, served on Christmas Eve pierogi night with beet soup or barszcz czerwony wigilijny, are small ear shaped pierogi filled with wild mushroom filling. These regional fillings reflect deep Polish traditions, where filling variety is part of cultural identity rather than novelty.
Importance of Pierogi Dough
The real secret behind great pierogi is understanding pierogi dough importance. Even the best filling cannot save poor dough quality. Properly thin rolled dough that becomes tender cooked dough is what separates average dumplings from memorable ones. Achieving the right dough texture and dough consistency is easier with homemade dough, especially when following an easy dough approach built on a basic dough recipe.
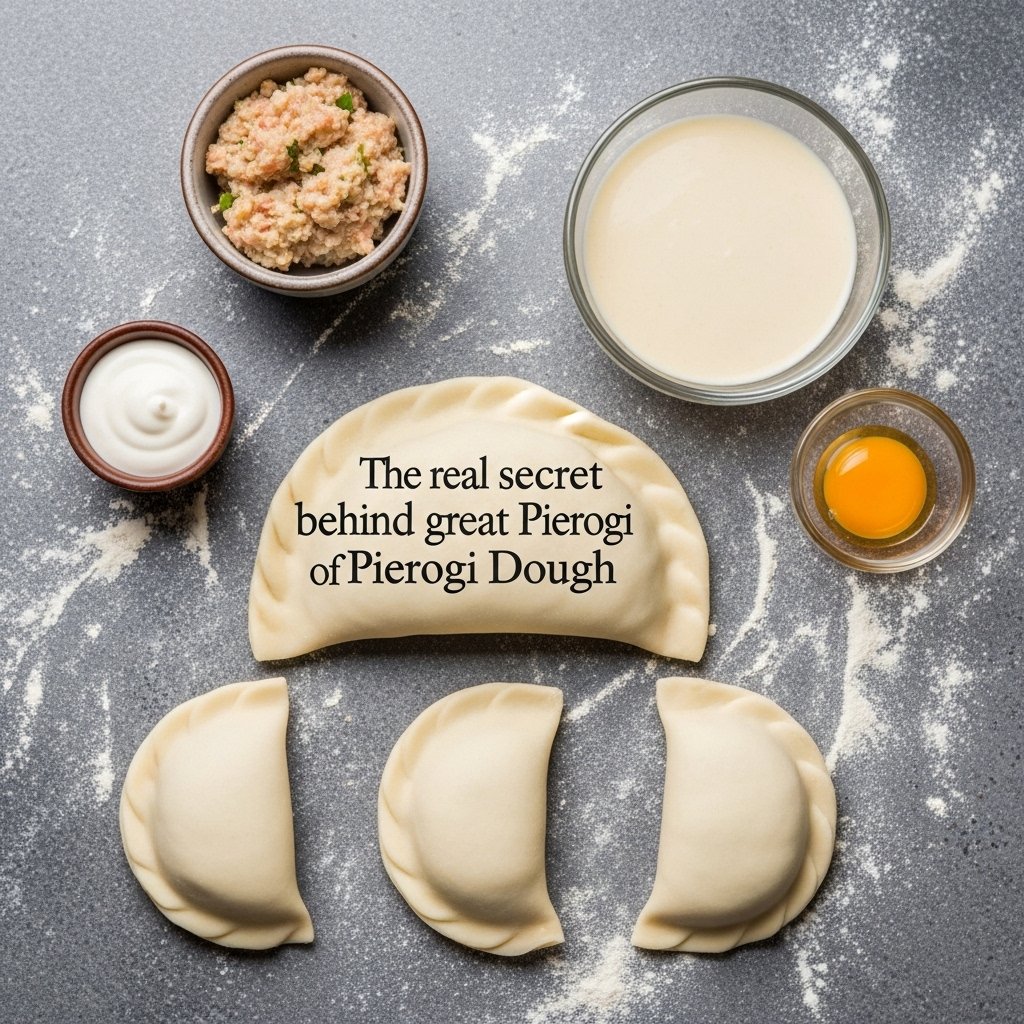
Over the years, I have tested many versions, from traditional dough recipe methods using flour egg water salt, to sour cream dough variation, warm milk dough, and even oil and water dough. After plenty of dough experimentation, I always return to basic ingredients, the traditional method, and a best dough base that delivers dough reliability every time.
Basic Polish Pierogi Dough Ingredients
A true traditional Polish dough relies on simple ingredients and a classic dough formula. This includes all purpose flour in the right flour quantity, usually 2 cups flour, combined with salt such as 1/4 teaspoon salt, one large egg, and hot water—typically 1/2 cup hot water at the correct water temperature. Some cooks add vegetable oil, like olive oil or canola oil, while others use a cream substitution for a tender dough adjustment.
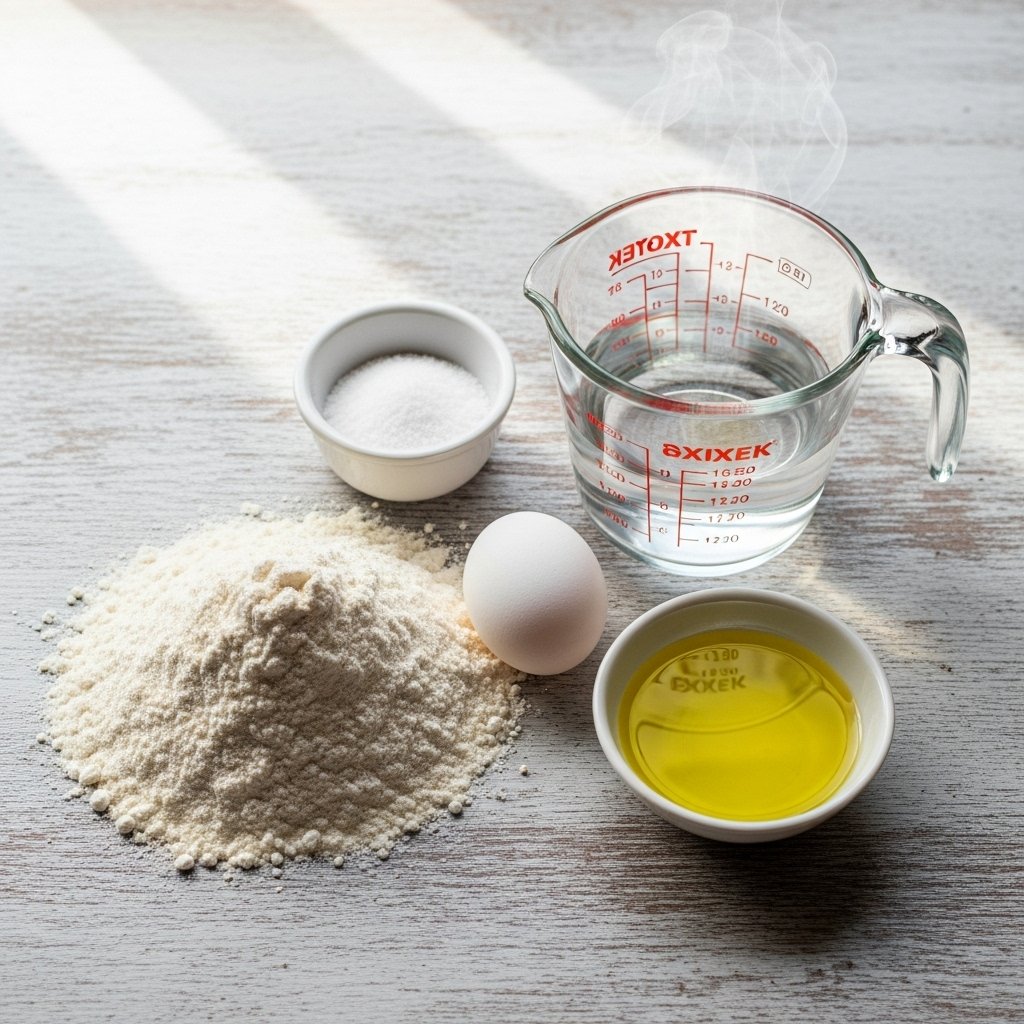
These ingredient proportions produce a consistent dough yield, often around 40 pierogi per batch. What I appreciate most is how these basic dough ingredients create dependable results while staying true to traditional Polish dough principles.
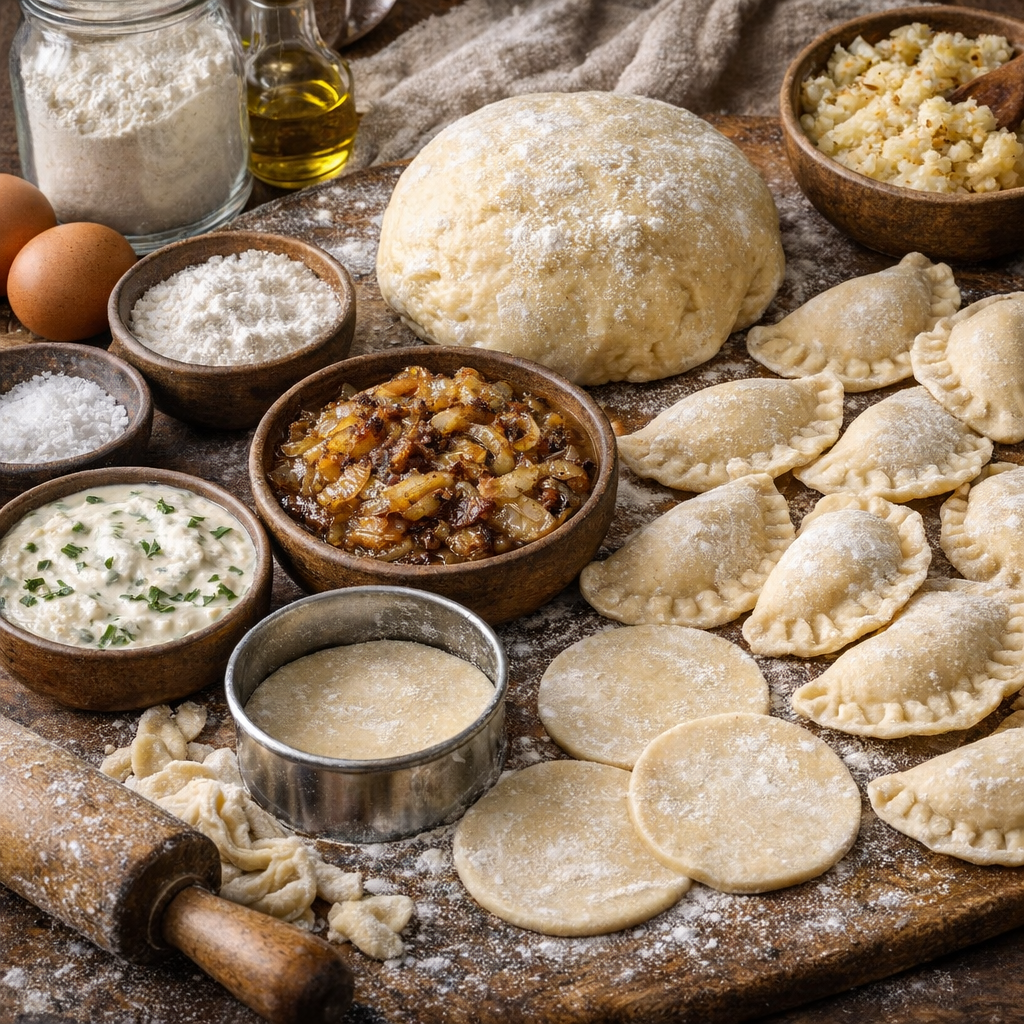
Making the Dough
The process starts with boiling water from a kettle or kettle water, measured in a measuring cup and allowed hot water cooling for about 5–7 minutes cooling. In a large bowl, begin by mixing flour and salt, then make a well for egg addition. Use fork mixing or hand mixing, then pour hot water and start immediate mixing until it forms a dough ball.
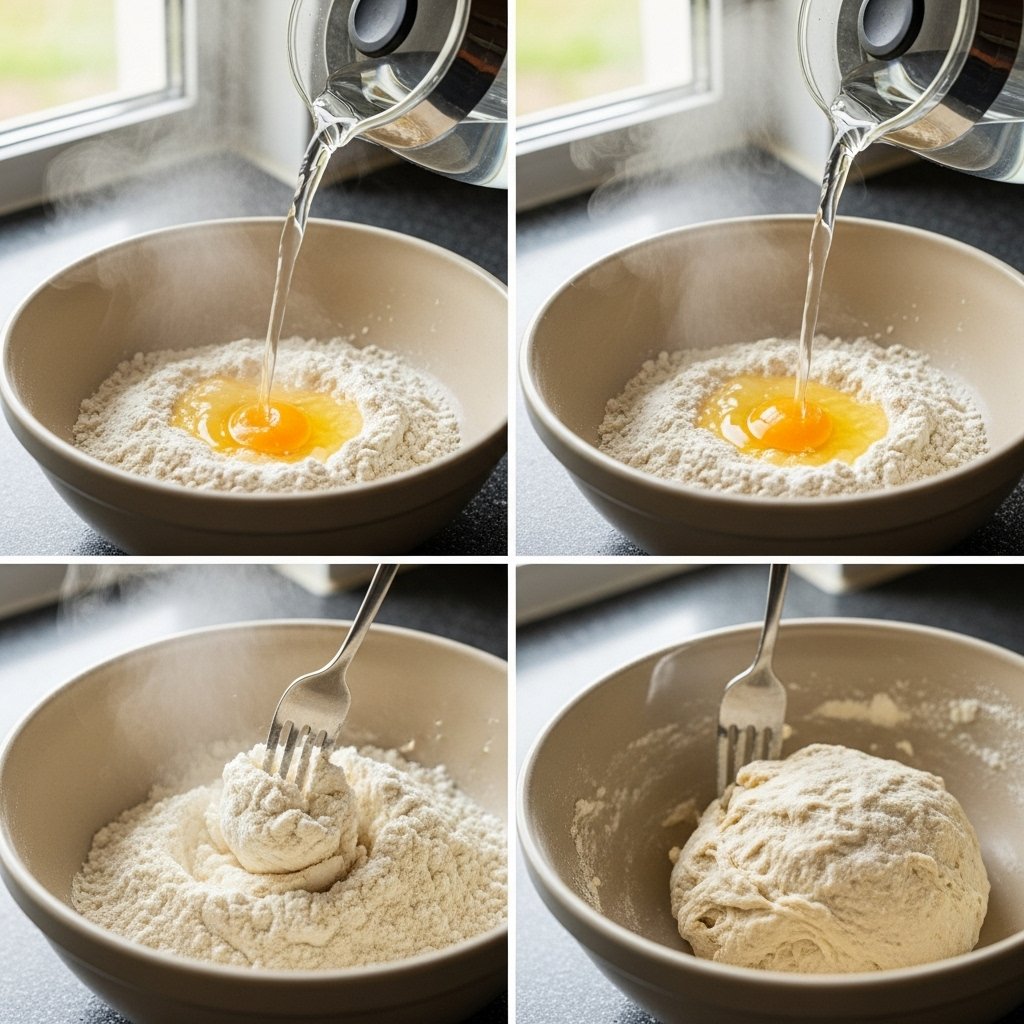
Continue kneading dough through countertop kneading until you reach smooth dough and elastic dough, usually knead 5 minutes. Cover dough with an upside down bowl, allow dough resting at room temperature for rest 10–20 minutes, or use plastic wrap storage and refrigeration up to 3 days, always remembering to bring to room temperature before rolling.
Rolling Out the Dough
Divide by cut dough portion and cover remaining dough to prevent drying. Work on a floured board, using a rolling pin or wooden board to achieve thin dough rolling. The target is 1/8 inch thickness or 3 mm thickness, which often requires you to flip dough repeatedly.
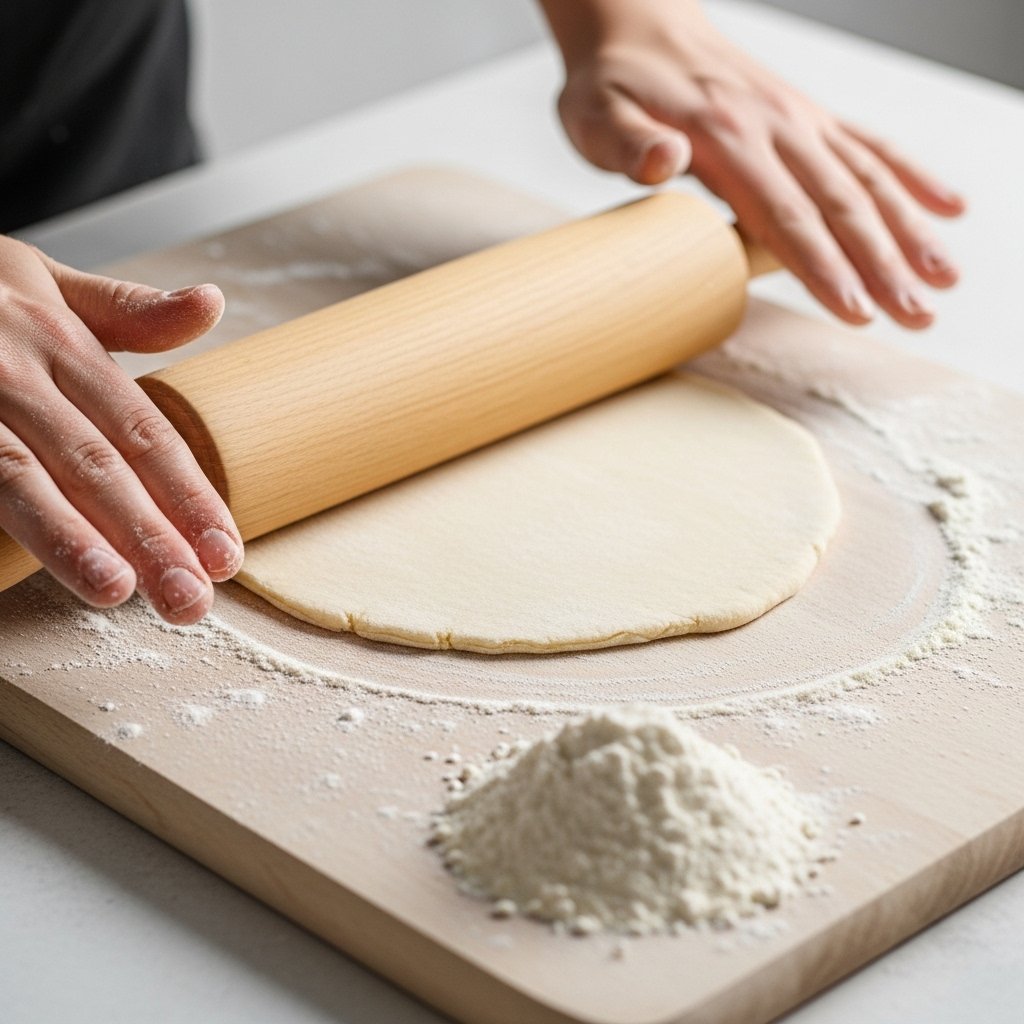
Light flour dusting helps prevent sticking while maintaining dough elasticity. With patience, you get even thickness, proper dough stretching, and a reliable rolling technique that supports clean shaping later.
Forming and Filling Pierogi
Use a wide drinking glass or cup cutter to cut circles about 3¼ inch diameter or 8.25 cm circles. Save and reuse dough scraps reuse, then dough circles flipping makes sealing easier. Add tablespoon filling, fold dough, and focus on sealing edges with a firm pinch seal and double pinch technique.
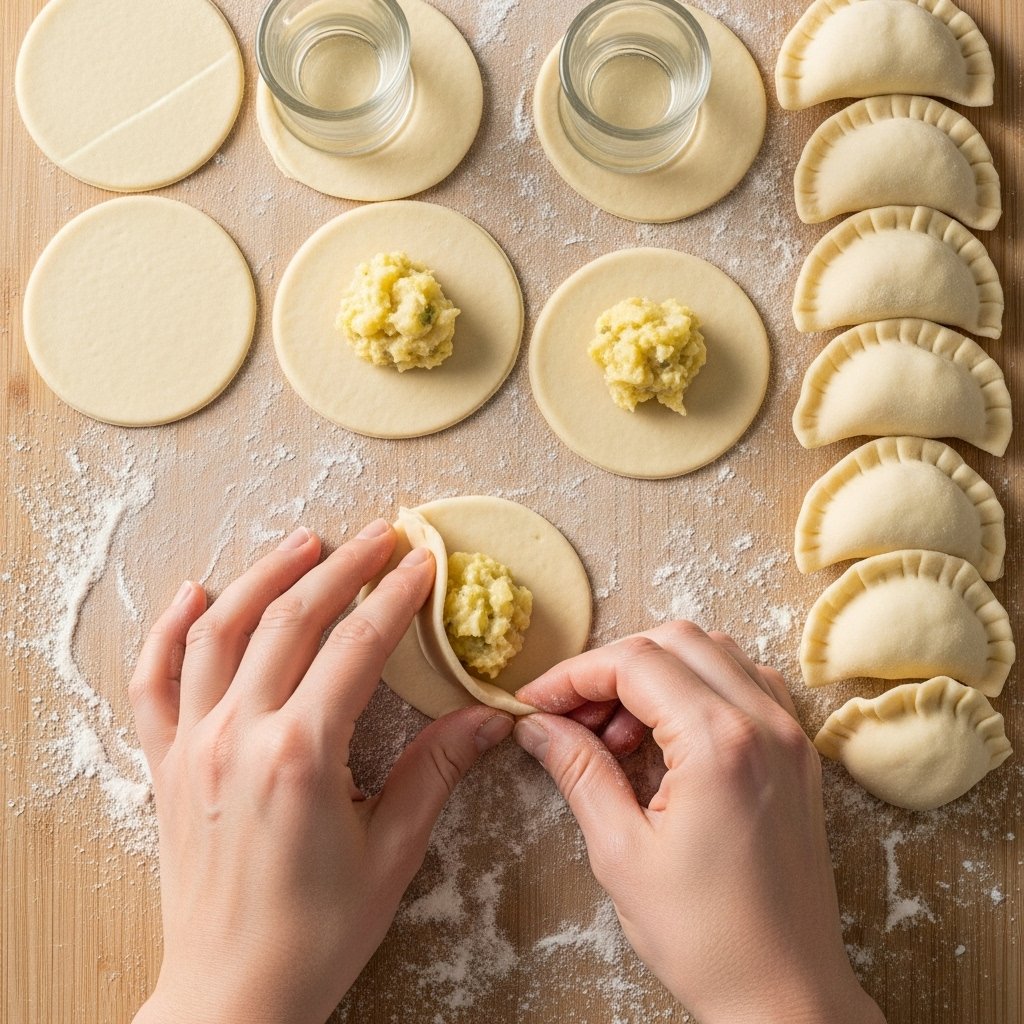
Keep clean edges, flour fingers if needed, and arrange filled pierogi placement in a single layer pierogi on a floured board. Lightly kitchen towel cover helps prevent sticking before cooking.
Cooking the Pierogi
Cook pierogi in a large stockpot, ideally an 8 quart pot, filled with boiling water and properly salted water using pasta style salting. Add vegetable oil in water and maintain a slow rolling boil. Practice batch cooking with 18–20 pierogi per batch, watching them sink and become floating pierogi.

Gently stir gently to prevent sticking, then cook 3 minutes after floating. Remove with a slotted spoon, allow colander draining, and finish with melted butter coating or olive oil drizzle, either in a skillet transfer or covered bowl with aluminum foil cover.
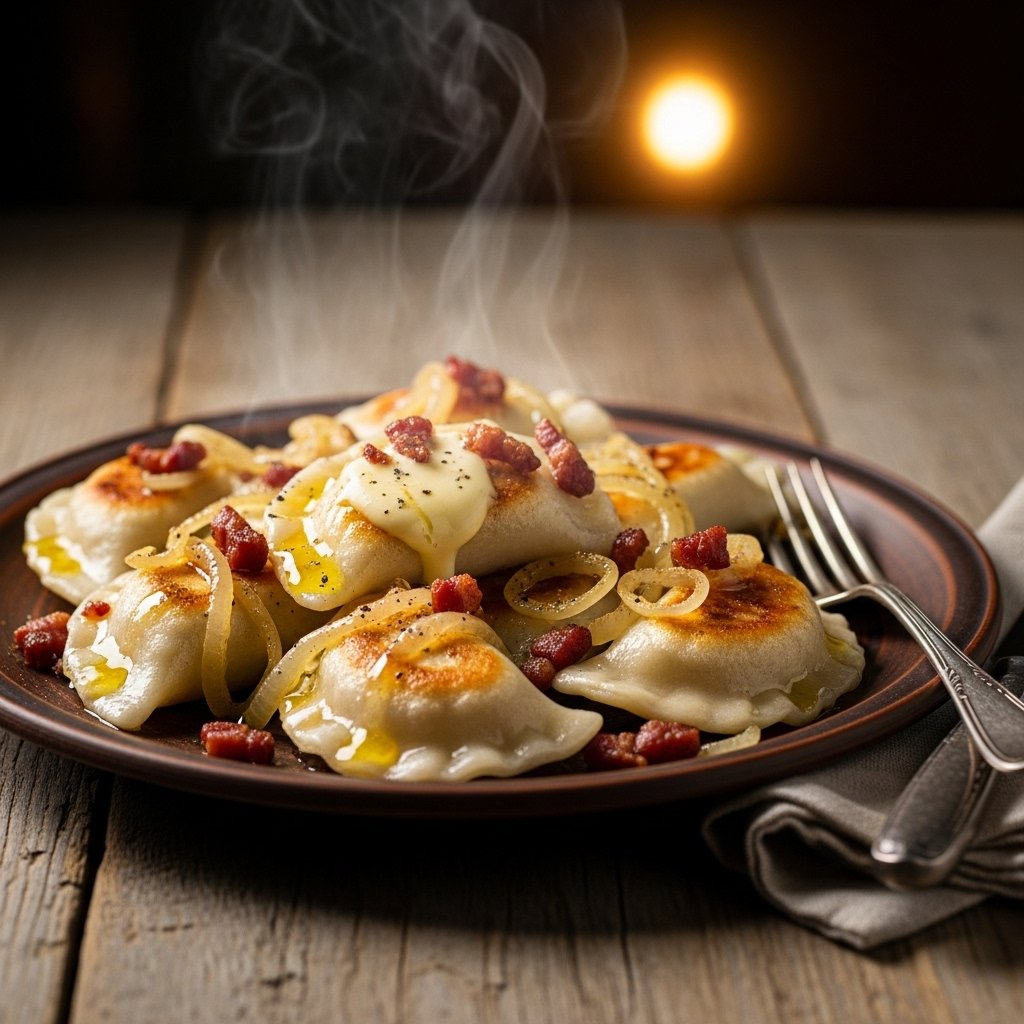
Serving Pierogi
The best approach is to serve immediately. Enjoy plain pierogi with melted butter topping or olive oil coating, or add sautéed onions, caramelized onions, and crispy bacon as an optional meat topping. This works well for savory pierogi serving.
For sweet pierogi serving, cream and sugar are traditional. Leftovers respond well to reheating pierogi, especially when pan frying leftovers for a crisp edge.
Storing and Freezing Pierogi
Let pierogi cool to room temperature before refrigerator storage. Proper cooked pierogi storage helps preserve texture. For long-term use, freezing pierogi in plastic wrap laid in a single layer freezing setup works best.
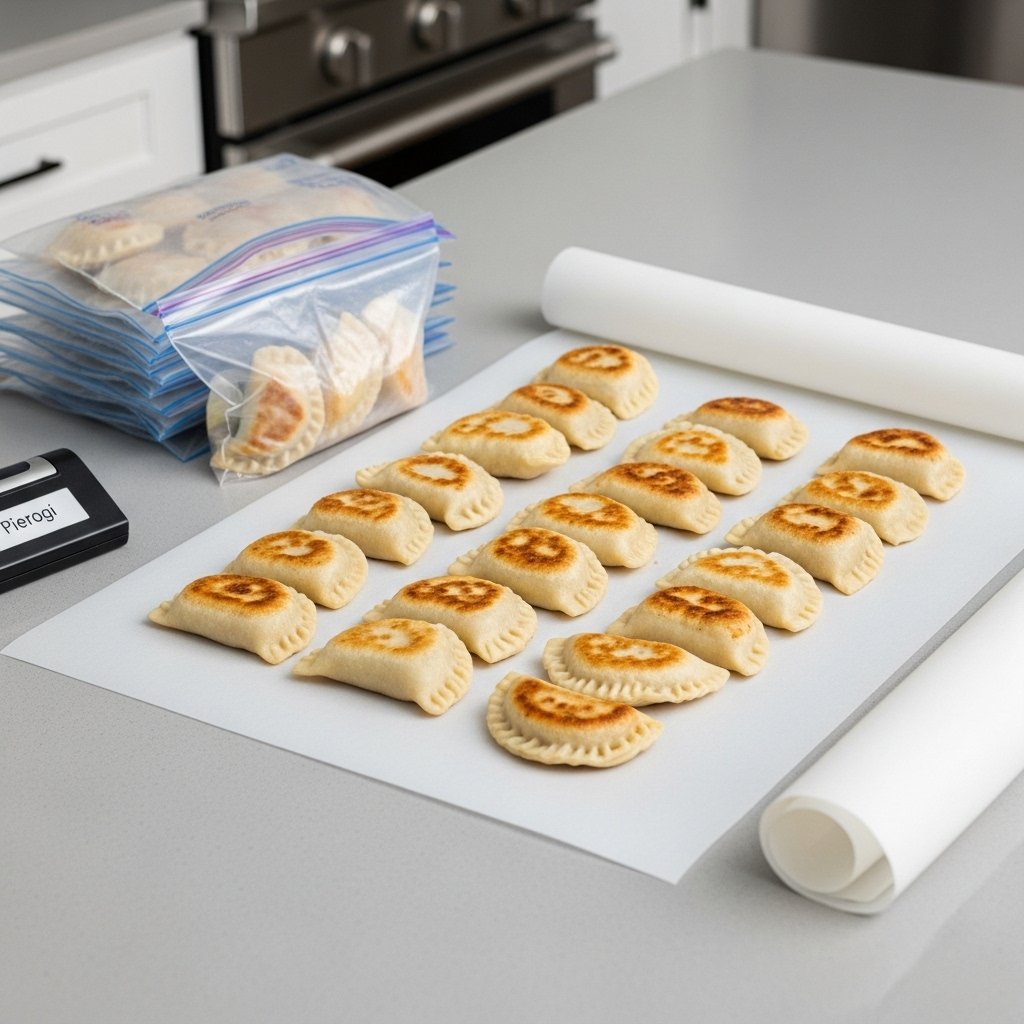
Transfer to a Ziploc freezer bag for safe freezer storage. This method supports reheating later and makes meal prep pierogi practical for busy schedules.
Recipe Notes and Filling Variations
Sweet options start with fruit filling like blueberries or cherries, with pits removed, sometimes mixed with bread crumbs, corn flour, and sugar optional. Popular savory fillings include sauerkraut and mushrooms, using dried wild mushrooms, soaking mushrooms, and even an overnight soak before mushroom cooking with bay leaf and allspice berries plus sautéed onions.
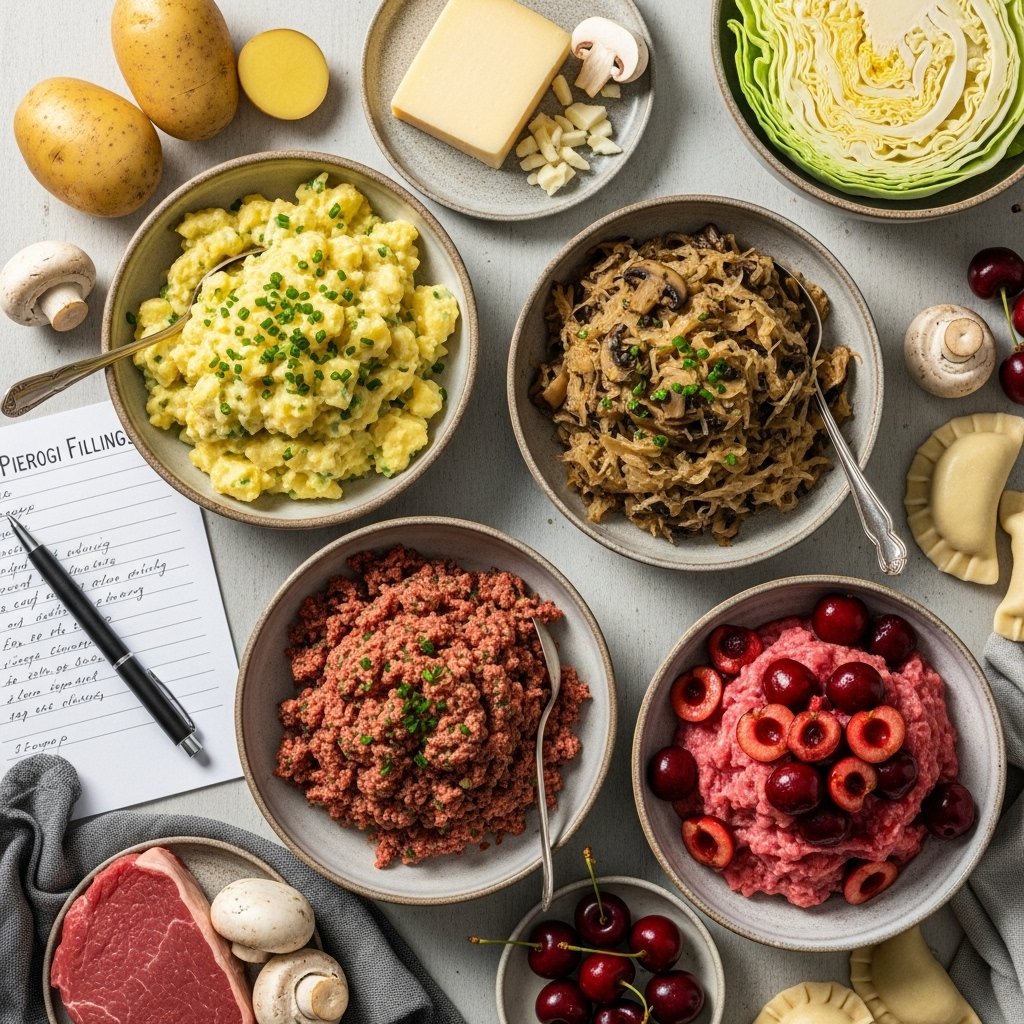
For classics, potato cheese filling uses farmer cheese or twaróg, with cottage cheese substitute if needed and proper onion sauté. Meat filling variations include turkey meat, chicken meat, pork meat, or beef meat, often mixed with buckwheat groats, rice, parsley, and finished with salt and pepper seasoning.
Frequently Asked Questions (FAQs)
What is traditional Polish pierogi dough made of?
Traditional Polish pierogi dough is made using simple ingredients like flour, egg, water, and salt. Some recipes also include a small amount of oil or butter, but the classic version keeps it basic to achieve a soft and tender texture.
Should pierogi dough be thin or thick?
Pierogi dough should be rolled thin, but not so thin that it tears while filling or boiling. A thickness of about 1/8 inch helps create pierogi that are tender after cooking and not doughy.
Do you need eggs in pierogi dough?
Eggs are commonly used in Polish pierogi dough, but they are not mandatory. Dough made without eggs can be softer, while egg-based dough is slightly firmer and easier to handle. Both versions are traditional.
Why does pierogi dough need to rest?
Resting the dough allows the gluten to relax, making it easier to roll out. Rested dough stretches better, does not shrink back, and results in smoother pierogi.
How do you know when pierogi are fully cooked?
Pierogi are fully cooked when they float to the surface of boiling water and remain there for about 2–3 minutes. Floating is the key sign that the dough is cooked through.
Can pierogi dough be made ahead of time?
Yes, pierogi dough can be made ahead and stored in the refrigerator for up to 3 days. Wrap it tightly in plastic wrap and bring it back to room temperature before rolling.
Why does pierogi dough become tough?
Pierogi dough becomes tough if it is over-kneaded, rolled too thick, or cooked too long. Using hot water and allowing the dough to rest helps keep it tender.
Can pierogi be frozen after cooking?
Yes, cooked pierogi can be frozen. Let them cool completely, freeze them in a single layer, then transfer them to a freezer bag. They can be reheated by boiling or pan-frying.
What is the difference between pierogi and pierogies?
“Pierogi” is already plural in Polish, while “pierog” is singular. The word “pierogies” is an English adaptation and commonly used outside Poland.
Is homemade pierogi dough better than store-bought?
Homemade pierogi dough is usually softer, more elastic, and has better texture than store-bought versions. It also allows full control over thickness and ingredients.